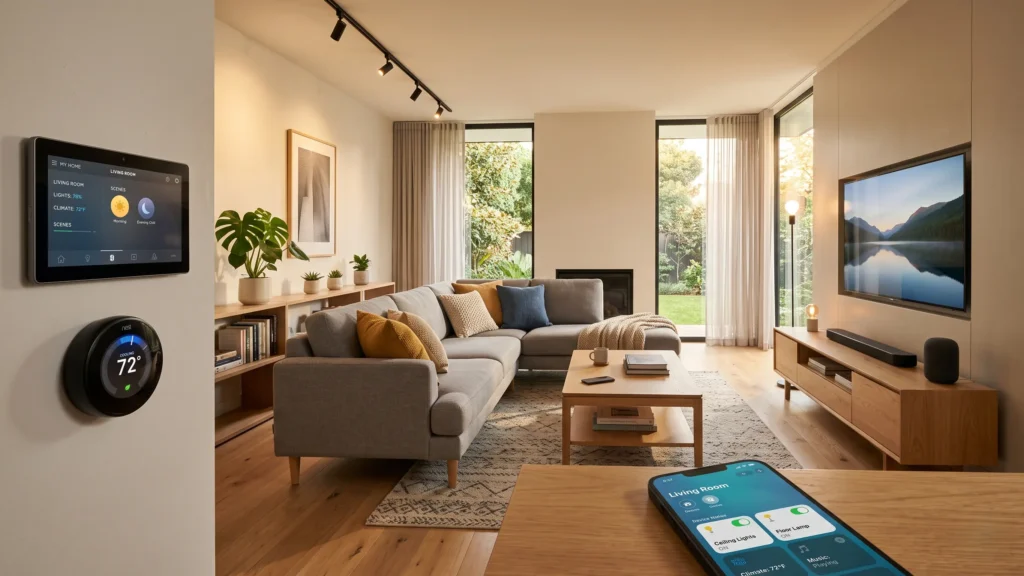

Smart home system installation involves four core phases: (1) assessing your home’s Wi-Fi coverage and electrical readiness, (2) choosing a smart home platform such as Amazon Alexa, Google Home, or Apple HomeKit, (3) installing and connecting devices like smart lights, thermostats, locks, and cameras, and (4) setting up automations and routines. Most basic setups take 2–4 hours for a DIY approach. Larger whole-home installations with hardwired devices typically require a certified professional installer and 1–3 days.
What Is Smart Home System Installation?
Smart home system installation is the process of setting up connected devices, software platforms, and network infrastructure that allow you to control your home’s lighting, climate, security, entertainment, and appliances remotely or automatically.
A properly installed smart home system brings together three components:
- Connected devices — smart bulbs, thermostats, locks, cameras, plugs, and sensors
- A central platform or hub — Amazon Alexa, Google Home, Apple HomeKit, or SmartThings
- A stable wireless or wired network — Wi-Fi, Zigbee, Z-Wave, or Thread protocols
The result is a home where your lights turn on when you arrive, your thermostat adjusts based on your schedule, and your security cameras send alerts to your phone in real time.
Types of Smart Home Systems
Not every smart home uses the same approach. The installation process differs based on the system type you choose.
| System Type | Best For | Installation Complexity | Cost Range |
|---|---|---|---|
| DIY Wi-Fi devices | Renters, beginners | Low | $100–$500 |
| Wireless hub-based (Zigbee/Z-Wave) | Mid-range whole-home | Medium | $500–$2,000 |
| Wired/hardwired systems | Custom builds, luxury homes | High | $2,000–$20,000+ |
| Professional monitored systems | Security-focused households | Medium | $300–$1,500/year |
Wi-Fi-based systems connect devices directly to your router without a hub. They are the easiest to install but rely heavily on your router’s bandwidth.
Hub-based systems use protocols like Zigbee or Z-Wave that do not compete with your Wi-Fi. They are more reliable for larger homes with many devices.
Wired or hardwired systems involve in-wall wiring, smart panels, and dedicated controllers. These require a licensed electrician and a certified integrator, but deliver the most reliable performance.
Why Proper Installation Matters
A poorly installed smart home creates more problems than it solves. Common results of bad installation include:
- Devices dropping offline constantly
- Automations triggering at wrong times
- Security vulnerabilities from unsecured networks
- Incompatible devices that do not communicate
- Electrical hazards from incorrect wiring
Taking time to plan and install correctly means your system works reliably every day.
Step 1 — Assess Your Home’s Infrastructure
Before buying a single device, check three things: Wi-Fi coverage, electrical compatibility, and existing wiring.
Check Your Wi-Fi Coverage
Your network is the backbone of any smart home system installation. Weak signal in areas where you plan to install devices will cause constant connectivity failures.
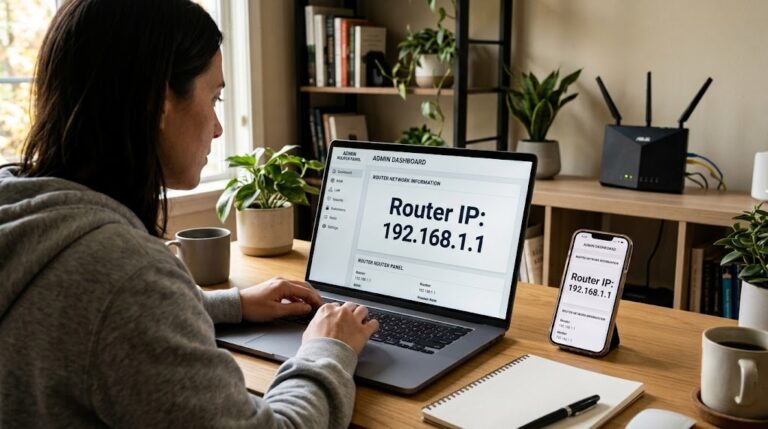
Use a free Wi-Fi analyzer app such as NetSpot (iOS/Android) or your router’s admin panel to map signal strength through your home. Key benchmarks:
- Strong signal: -30 to -67 dBm — suitable for all smart devices
- Moderate signal: -68 to -79 dBm — may cause delays with video cameras
- Weak signal: -80 dBm or lower — devices will drop offline frequently
If you have dead zones, add a Wi-Fi mesh node, a range extender, or upgrade to a mesh router system before installing any smart devices.
Verify Electrical Compatibility
Smart switches and dimmers require a neutral wire in the wall switch box. Older homes built before 1990 often lack neutral wires. Check your switch boxes before ordering any smart switches.
If your home does not have neutral wires, choose smart switches specifically designed for no-neutral setups, such as Lutron Caseta Wireless.
Count Available Wi-Fi Bandwidth
Most home routers handle 20–30 connected devices comfortably. A full smart home installation with 40–80+ devices needs either a router rated for 100+ connections or a mesh system. Check your router’s maximum client specification in its documentation.
Step 2 — Choose the Right Smart Home Platform
Your platform choice determines which devices you can use, how you control them, and how your automations work. There is no universal best option — it depends on your current devices and priorities.
Amazon Alexa
Amazon Alexa works with more third-party devices than any other platform. It is the most cost-effective entry point and handles voice commands well. Best for users who are not deep in the Apple or Google ecosystem.
Google Home
Google Home integrates closely with Android phones and Google services. Google Assistant handles complex, multi-step voice commands better than most alternatives. Best for Android users and households already using Google devices.
Apple HomeKit
Apple HomeKit requires all connected devices to carry HomeKit certification, which limits device selection. However, it offers the strongest privacy protections, local processing (no cloud dependency for many functions), and easy setup through the Apple Home app. Best for iPhone and iPad households that prioritize privacy.
Samsung SmartThings
SmartThings is a hub-based platform that supports Zigbee, Z-Wave, and Wi-Fi devices, making it highly flexible. It works across Android and iOS and supports complex automations through Rules API. Best for users who want protocol flexibility and advanced automations.
Matter Standard
Matter is an open-source connectivity standard developed by the Connectivity Standards Alliance. Devices with Matter certification work across Alexa, Google Home, Apple Home, and SmartThings without compatibility issues. When selecting devices, choosing Matter-certified products future-proofs your installation.
Platform Comparison:
| Platform | Voice Assistant | Device Ecosystem | Local Processing | Best For |
|---|---|---|---|---|
| Amazon Alexa | Alexa | Largest | Partial | Device variety, budget |
| Google Home | Google Assistant | Large | Partial | Android users, voice |
| Apple HomeKit | Siri | Certified only | Strong | Privacy, iPhone users |
| SmartThings | Bixby + others | Very large | Yes (hub) | Advanced automations |
Step 3 — Select Your Smart Devices
Start with high-impact devices that deliver noticeable value. Add more devices over time as you understand how your system works.
Recommended Starter Devices
Smart Lighting: Smart bulbs like Philips Hue or LIFX are the fastest way to experience smart home control. A starter pack of 4 bulbs with a bridge costs $80–$200. Smart in-wall switches like Lutron Caseta ($60–$90 per switch) are better for whole-room control and work with existing non-smart bulbs.
Smart Thermostat: A smart thermostat reduces energy costs by 10–15% in most homes, according to data from the U.S. Department of Energy. The Google Nest Learning Thermostat ($130) and Ecobee SmartThermostat ($250) are top options. Both support Amazon Alexa, Google Home, and Apple HomeKit.
Smart Security Camera: Indoor cameras start at $30 (Wyze Cam) and range to $200+ (Arlo Pro 5). Outdoor cameras add weatherproofing requirements. Check that your chosen camera supports your platform before purchasing.
Smart Door Lock: Schlage Encode, Yale Assure, and August Smart Lock are the leading options. Installation replaces only the interior deadbolt hardware — the door itself and the exterior strike plate remain unchanged.
Smart Plug: Smart plugs ($10–$25 each) convert any standard appliance into a smart-controllable device. They are the fastest installation of any smart home component.
Step 4 — Set Up Your Central Hub or Controller
If you are using a hub-based system, set up the hub first before installing any devices. The hub is the communication controller for all Zigbee or Z-Wave devices.
Hub Setup Steps
- Connect the hub to your router using an ethernet cable (not Wi-Fi, for reliability).
- Power on the hub and download the associated app (SmartThings, Hubitat, etc.).
- Create your account and register the hub to your home.
- Name your hub and set your location — this enables time-based automations and geofencing.
- Check for firmware updates before pairing any devices.
For cloud-based platforms like Amazon Alexa or Google Home, the “hub” is the app and ecosystem. Set up your account, enable relevant skills or integrations, and configure your home location before adding devices.
Step 5 — Install Smart Devices Room by Room
Work room by room to keep installation organized. Complete full setup in each room before moving to the next.
Installing Smart Lights (Bulbs)
- Turn off the light switch at the wall.
- Remove the existing bulb.
- Screw in the smart bulb.
- Leave the wall switch permanently in the ON position (smart bulbs need constant power).
- Open the app and follow pairing instructions — typically 2–5 minutes per bulb.
Installing Smart Light Switches
Warning: Turn off the circuit breaker for the room, not just the wall switch. Use a non-contact voltage tester before touching any wires.
- Turn off power at the breaker panel.
- Remove the existing switch plate and pull the switch out.
- Photograph the existing wiring before disconnecting anything.
- Connect wires to the smart switch according to the wiring diagram (line, load, neutral, ground).
- Mount the smart switch and attach the cover plate.
- Restore power and pair the switch using its app.
If you are not comfortable with electrical work, hire a licensed electrician for switch installation. Smart switches involve live household wiring.
Installing a Smart Thermostat
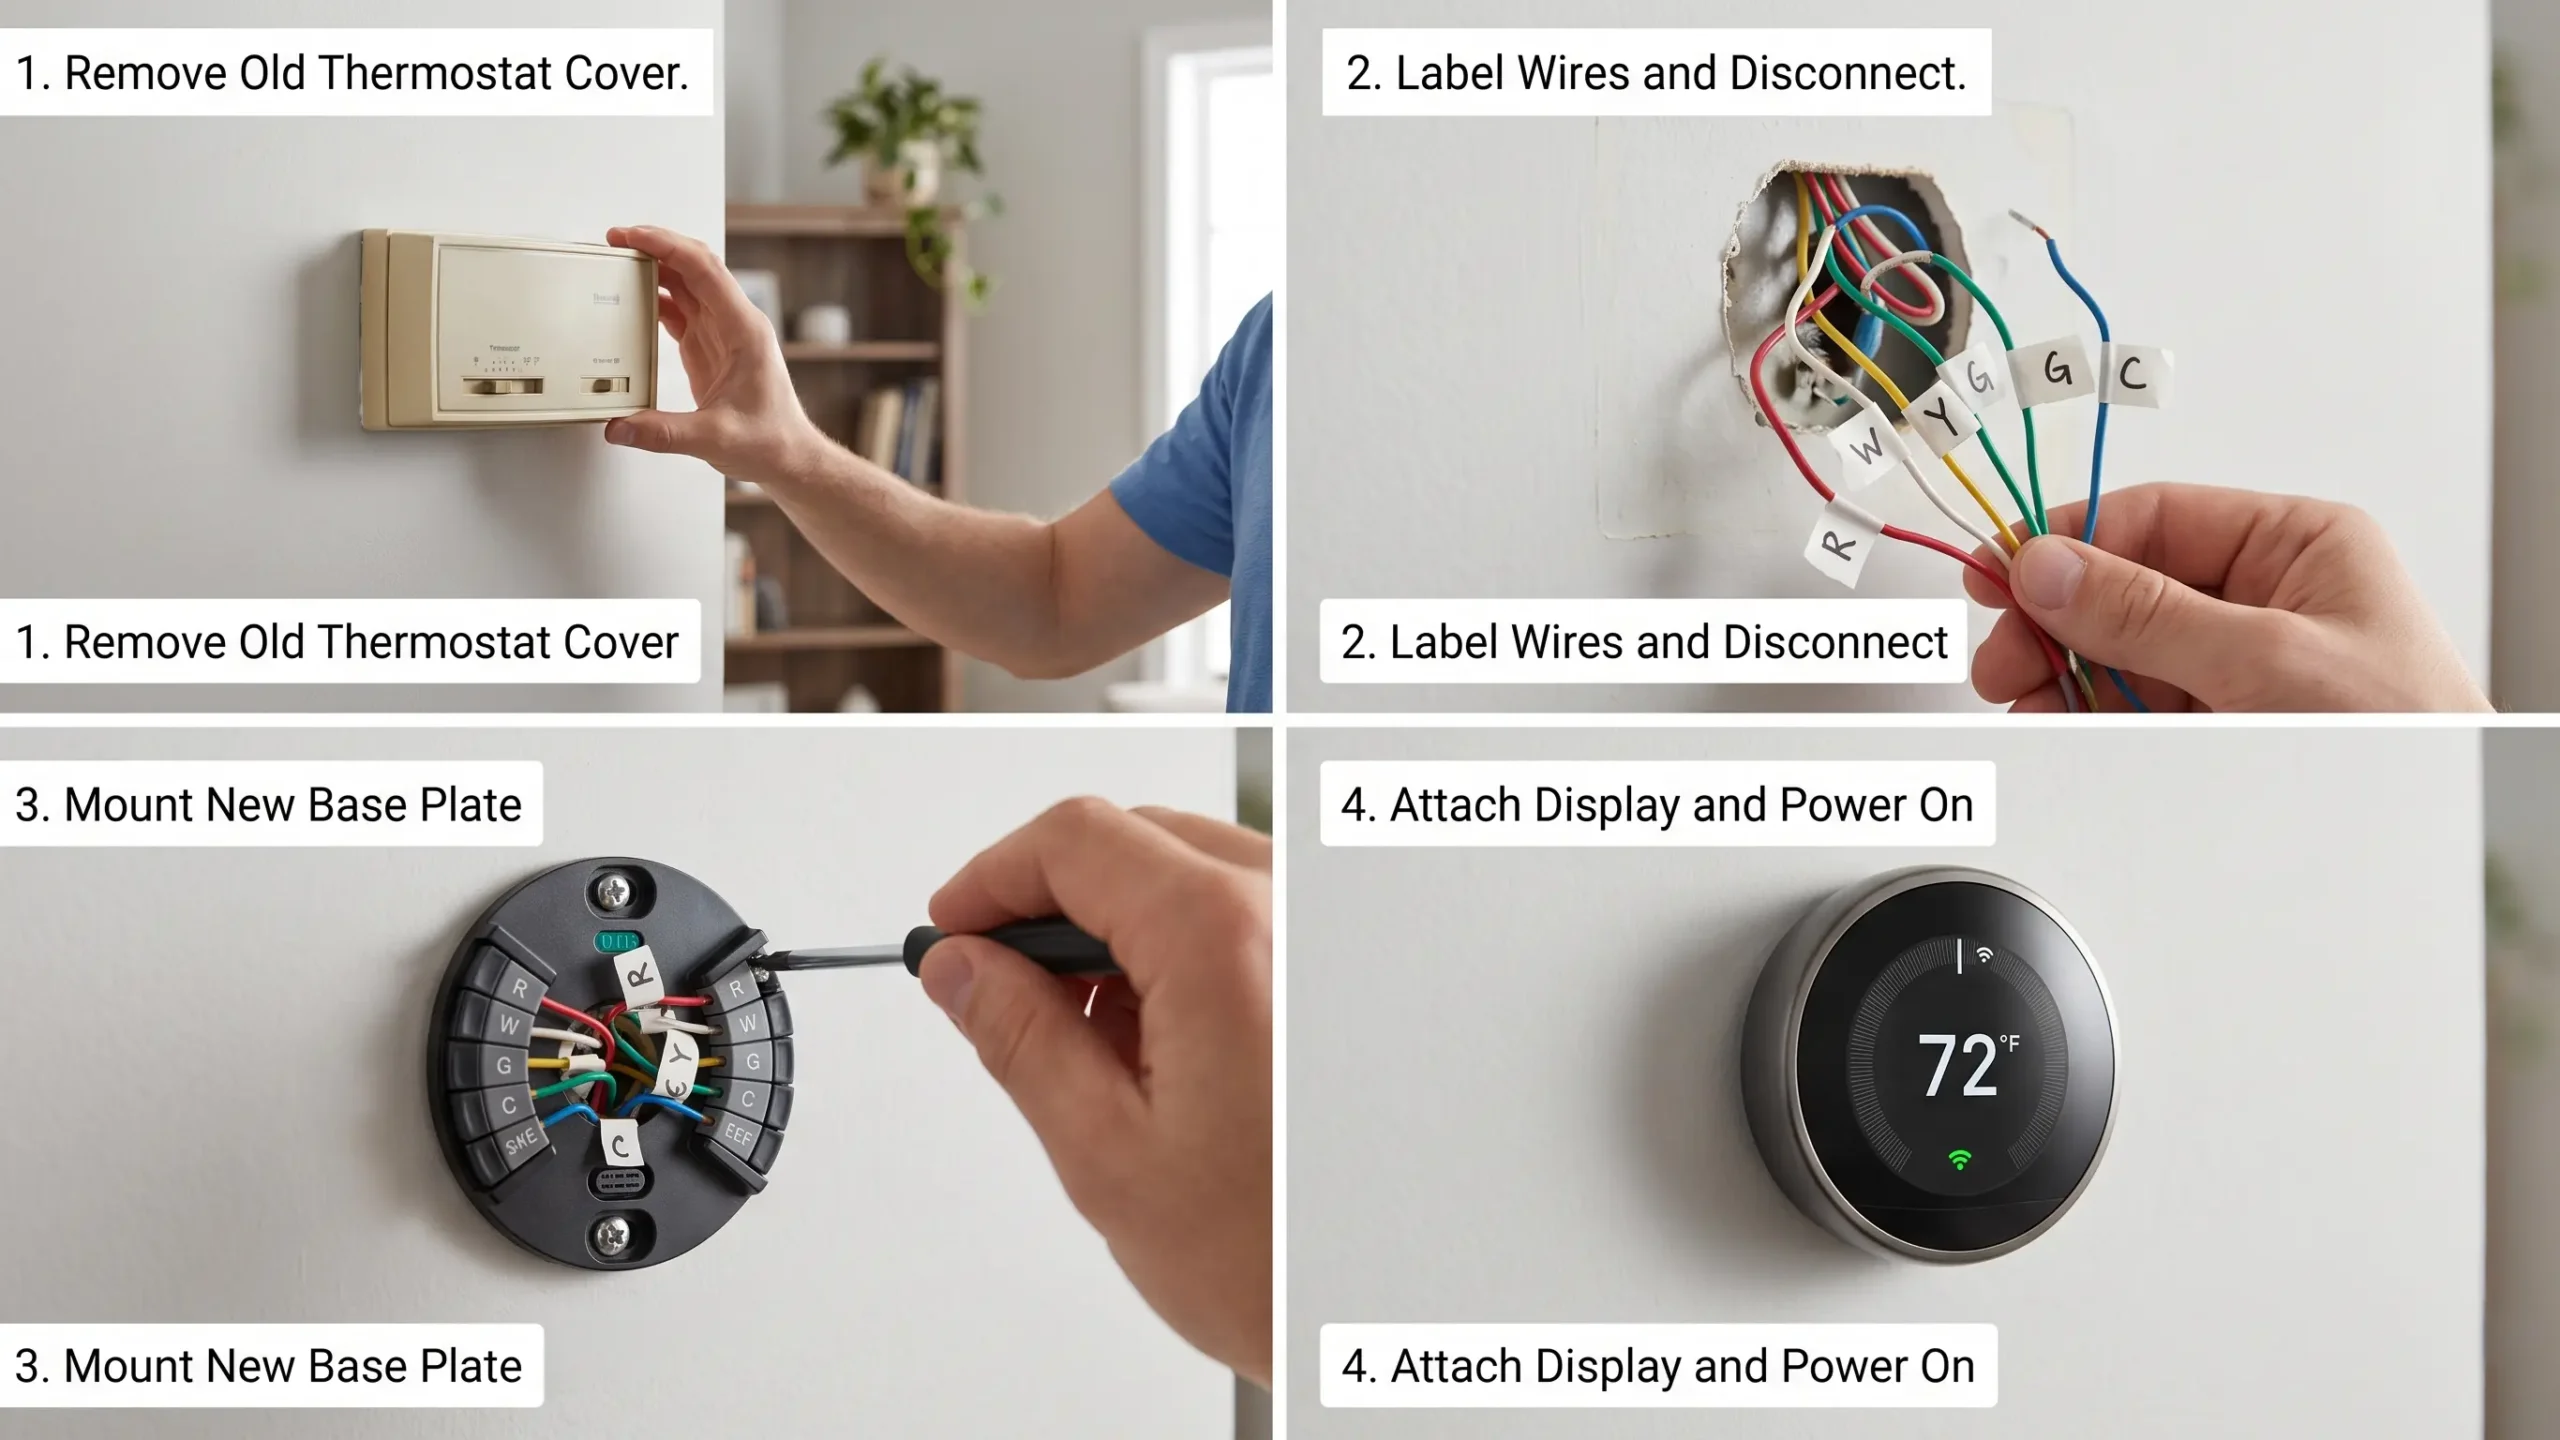
- Take a photo of your existing thermostat wiring before removing anything.
- Turn off the HVAC system at the breaker or furnace switch.
- Remove the existing thermostat and label each wire using painter’s tape and a marker.
- Mount the new thermostat base plate and connect wires to matching terminals.
- Snap the thermostat display onto the base.
- Restore power and follow the app setup wizard.
- Enter your home’s HVAC system type (gas, electric, heat pump) when prompted.
Installing a Smart Door Lock
- Remove the existing deadbolt interior assembly (typically 2 screws on the interior cover).
- Insert the smart lock mechanism, threading the connecting rod through the door.
- Secure the interior assembly.
- Attach the exterior keypad or thumb turn.
- Test manual operation before pairing to the app.
- Follow app pairing instructions.
Installing Smart Security Cameras
Indoor cameras: Plug into any standard outlet. Place near the corner of a room facing the main entry point for maximum coverage. Aim downward 10–15 degrees to capture faces at entry height.
Outdoor cameras: Mount under an eave or soffit to protect from direct rain. Angle toward driveways and pathways at 8–10 feet height for best face capture. Run power via outdoor-rated extension cord or, for permanent installation, have an electrician run a dedicated outdoor outlet.
Step 6 — Connect Devices to Your Platform
Once devices are physically installed, connect them to your central platform for unified control.
General Connection Process
- Open your smart home app (Alexa, Google Home, Apple Home, SmartThings).
- Tap “Add Device” or the “+” icon.
- Select the device type and brand.
- Follow on-screen pairing instructions — this usually involves putting the device in pairing mode (blinking LED or button hold).
- Assign the device to a room in your app.
- Rename the device to a descriptive name (e.g., “Living Room Ceiling Light” not “Light 1”).
Troubleshooting Connection Issues
- If pairing fails, ensure your phone is on the same 2.4 GHz Wi-Fi network as the device (many smart devices do not support 5 GHz during pairing).
- Reset the device to factory settings if a previous pairing exists.
- Move closer to your router during initial pairing.
- Check that Bluetooth is enabled on your phone — many devices use Bluetooth for initial setup before switching to Wi-Fi.
Step 7 — Program Automations and Routines
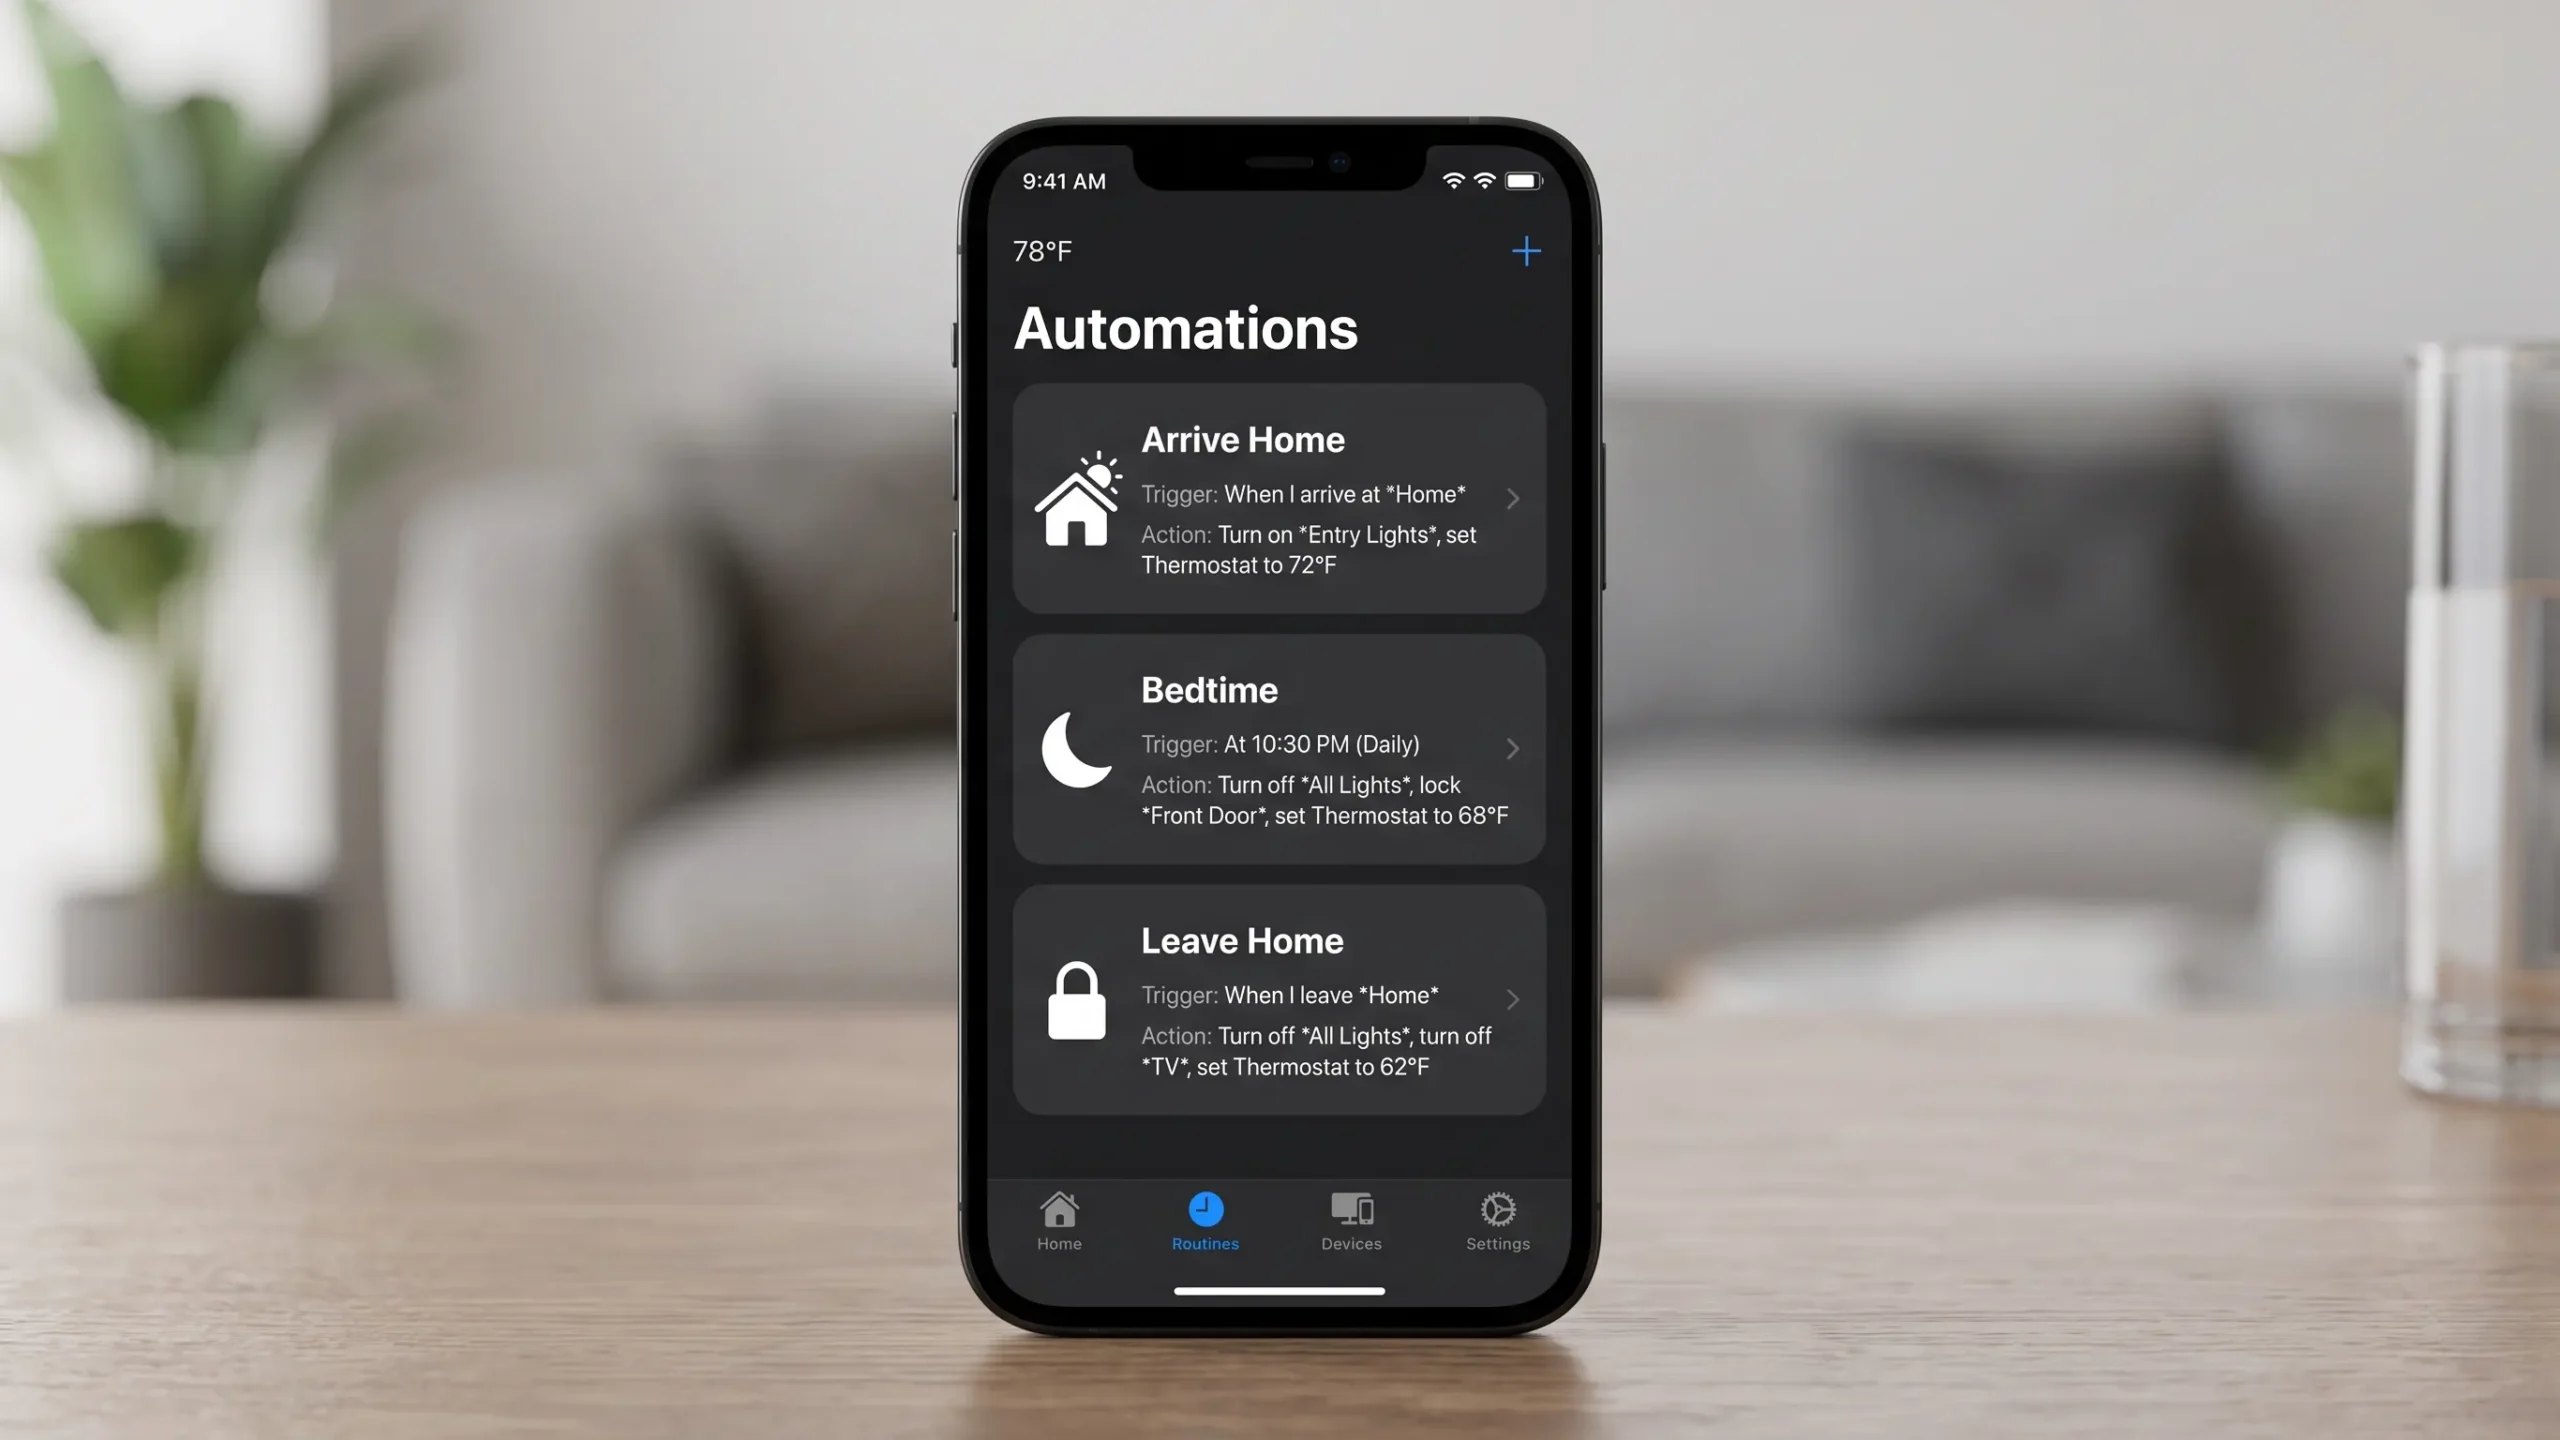
Automations make your smart home work without manual input. This is where the real convenience begins.
Recommended Starter Automations
Arrival routine: When your phone’s location detects you arriving home, turn on entry lights and disengage the front door lock.
Departure routine: When everyone leaves home, turn off all lights, lock all doors, and set the thermostat to an energy-saving temperature.
Bedtime routine: At a set time, turn off all lights except bedroom, lock doors, and lower thermostat temperature.
Sunrise/sunset lighting: Automatically turn outdoor lights on at sunset and off at sunrise using your location’s local sunrise/sunset data.
Motion-triggered lighting: Turn on lights when motion is detected in hallways or bathrooms and turn them off after 5 minutes of no motion.
Setting Up Automations
In Amazon Alexa: Go to the Routines section in the Alexa app. Select a trigger (schedule, voice, arrival, sensor) and add actions.
In Google Home: Open the Automations tab. Select “Create Automation” and choose your trigger and device actions.
In Apple HomeKit: Go to the Automations tab in the Home app. Select a trigger type (time, location, accessory state) and set conditions and actions.
Step 8 — Secure Your Smart Home Network
A smart home with 20+ connected devices is a significant security surface. Unsecured smart home networks are a real target for hackers.
Essential Security Steps
Create a separate IoT Wi-Fi network: Most modern routers support a guest network or VLAN. Put all smart home devices on a separate network from your computers and phones. If a smart device is compromised, attackers cannot access your primary devices.
Change default device passwords immediately: Many smart devices ship with default credentials like “admin/admin.” Change all passwords during initial setup.
Enable two-factor authentication on your smart home apps: This applies to Amazon, Google, Apple, and SmartThings accounts.
Keep device firmware updated: Enable automatic updates where available. Firmware updates often contain security patches for known vulnerabilities.
Disable unused features: If a device has remote access features you do not use, disable them. Fewer open ports mean fewer attack vectors.
Use WPA3 encryption on your router: WPA3 is the current strongest Wi-Fi security standard. Check your router settings and upgrade from WPA2 if your router supports it.
DIY vs. Professional Smart Home Installation
| Factor | DIY Installation | Professional Installation |
|---|---|---|
| Cost | Lower (device cost only) | Higher ($75–$200/hour labor) |
| Time | 2–8 hours for basic setup | 4–24 hours |
| Skill required | Low to medium | Low for user (tech does the work) |
| Reliability | Depends on setup quality | Generally higher |
| Warranty | Device warranty only | Often includes labor warranty |
| Best for | Renters, small setups, tech-savvy users | Whole-home, hardwired, custom systems |
When to Hire a Professional Installer
Hire a professional for smart home system installation in these situations:
- You want hardwired in-wall speakers, lighting controls, or motorized shades.
- You need structured wiring for a multi-room audio/video system.
- Your home does not have neutral wires and needs electrical updates.
- You want a fully integrated system with a dedicated control panel.
- You are installing a professional-grade security system with 24/7 monitoring.
Certified smart home installers hold credentials from the Control4 Certified Installer Program, Crestron Certified Programmer Program, or CEDIA (Custom Electronic Design & Installation Association) certification.
Smart Home Installation Cost Breakdown
| Component | DIY Cost | Professional Cost |
|---|---|---|
| Smart speaker/hub | $50–$200 | $50–$200 + $50 setup |
| Smart lighting (per room) | $30–$150 | $30–$150 + $60–$100 labor |
| Smart thermostat | $130–$250 | $130–$250 + $100–$150 labor |
| Smart lock (per door) | $150–$300 | $150–$300 + $80–$120 labor |
| Smart security cameras (4-pack) | $100–$600 | $100–$600 + $150–$300 labor |
| Whole-home smart system (basic) | $500–$2,000 | $2,000–$8,000 |
| Luxury integrated system | N/A | $15,000–$50,000+ |
Common Mistakes to Avoid
Buying devices before checking platform compatibility. A smart bulb that only works with Google Home will not function in an Apple HomeKit setup. Always verify compatibility before purchasing.
Using Wi-Fi instead of ethernet for the hub. Hubs connected via Wi-Fi experience higher latency and occasional dropouts. Always connect hubs via ethernet cable.
Skipping the neutral wire check. Many smart switches require a neutral wire. Installing a switch in a box without a neutral wire will damage the device or cause flickering.
Naming devices generically. Naming 10 devices “Smart Light” makes voice control useless. Use room-specific descriptive names from the start.
Setting up all devices at once before testing. Install and test one device fully before moving to the next. This makes troubleshooting much easier.
Not creating a separate IoT network. Putting smart devices on the same network as personal computers creates security risks.
Forgetting to save app login credentials. Smart home apps are tied to accounts. If you lose access to the account, you lose control of the devices.
Myths vs. Facts About Smart Home Installation
| Myth | Fact |
|---|---|
| Smart homes require extensive electrical work. | Most smart home systems are wireless and plug-and-play. Only switch and thermostat installation involves wiring, and even that is manageable for a careful DIYer. |
| All smart devices work together automatically. | Devices must share a common platform or protocol to communicate. Mixing incompatible brands without a hub can result in siloed devices that do not interact. |
| Smart homes are only for tech experts. | Modern platforms like Google Home and Apple Home are designed for non-technical users. Setup typically takes 5–10 minutes per device. |
| You need to replace everything at once. | Smart home systems are modular. You can start with one device and expand over months or years. |
| Smart home devices always require internet. | Many functions work locally. Apple HomeKit, SmartThings Hub, and Lutron Caseta all process many commands locally without cloud dependency. |
| Smart homes are expensive to install. | A functional smart home with lights, a thermostat, and a smart speaker can be installed for under $300 with DIY setup. |
Smart Home Installation Troubleshooting Checklist
Use this checklist when devices fail to connect or behave unexpectedly.
Connectivity Issues
Confirm device is within Wi-Fi range (signal at -67 dBm or stronger)
Verify phone is on 2.4 GHz network during pairing (not 5 GHz)
Check that the device is powered on and in pairing mode
Confirm Bluetooth is enabled on your phone during initial setup
Restart your router and try pairing again
Device Not Responding
Check device power supply (outlet working? bulb seated correctly?)
Check for pending firmware updates
Remove and re-add device in app
Factory reset device and re-pair
Automations Not Triggering
Confirm automation is enabled in app settings
Check location permissions — location-based automations need background location access
Verify time zone settings in app match your actual location
Check that all devices in the automation are online
Voice Commands Not Working
Confirm device names are unique and clearly pronounceable
Re-sync devices in the voice assistant app
Check that the correct skill or integration is enabled
Expert Tips From the Field
In my experience setting up smart home systems for clients ranging from one-bedroom apartments to five-bedroom houses, a few principles consistently produce the best results:
Start with lighting and a thermostat. These two categories deliver the most noticeable daily value and provide the smoothest introduction to smart home automation. Once you see how well automated lighting and climate control works, expanding the system feels natural.
Plan your device placement before purchasing. Walking through your home and noting exactly where each device will go — and where power outlets and switches are — prevents returns and compatibility surprises.
Choose a single platform and stay with it. Mixed-platform setups work, but they add complexity. Pick one primary platform that matches your phone ecosystem and build around it. Add devices from other platforms only when necessary.
Buy one device of a new type before buying multiples. If you are adding smart switches for the first time, install one, live with it for a week, and confirm it works as expected before wiring six more.
Document your setup. Keep a simple note with device names, the app accounts they are registered to, and Wi-Fi network information. If you need to reset or replace a device later, this saves significant time.
People Also Ask
How long does smart home system installation take?
A basic DIY smart home installation — a smart speaker, a few bulbs, a thermostat, and a smart lock — typically takes 2–4 hours. A whole-home installation with 20–40 devices takes 6–12 hours spread across multiple sessions. Professional installation of a fully integrated system with wired components takes 1–5 days depending on home size.
Do I need a hub for a smart home system?
Not always. Wi-Fi-based devices connect directly to your router and are controlled through their respective apps or platforms without a separate hub. However, a hub is recommended if you want to use Zigbee or Z-Wave devices, need offline functionality, or are building a large system with 30+ devices. Hubs provide more reliable communication and local processing.
Can smart home systems work without internet?
Many smart home functions work without internet when devices are on a local hub. Apple HomeKit with a Home Hub (HomePod or Apple TV), Samsung SmartThings Hub, and Hubitat all process automations locally. Basic commands like turning lights on or off continue working during internet outages. Cloud-dependent features like remote access, AI voice assistants, and firmware updates require internet connectivity.
What is the best smart home platform for beginners?
For most beginners, Amazon Alexa or Google Home is the best starting point. Both support a wide range of affordable devices, have intuitive apps, and offer simple automation setup. Amazon Alexa supports the most third-party devices. Google Home offers better voice assistant performance. iPhone users who prioritize privacy may prefer Apple HomeKit.
Is smart home system installation safe to do yourself?
Smart bulb and plug installation is fully safe for any user — no electrical work involved. Smart thermostat installation is safe for most adults comfortable with basic tools and following instructions. Smart switch installation involves live household wiring and carries real risk if done without proper precautions. Always turn off the circuit breaker (not just the wall switch) and use a voltage tester before touching any wires. If in doubt, hire a licensed electrician.
How much does professional smart home installation cost?
Professional smart home installation ranges from $500–$2,000 for a basic whole-home setup (lighting, thermostat, cameras, and locks) to $15,000–$50,000+ for fully integrated luxury systems with custom lighting control, whole-home audio, motorized shades, and dedicated touch panels. Most certified integrators charge $75–$200 per hour for labor.
What Wi-Fi speed do I need for a smart home?
A minimum of 25 Mbps download and 10 Mbps upload is sufficient for a basic smart home. For homes with 20+ smart devices plus streaming and video calls, a plan of 100–300 Mbps is more appropriate. More important than raw speed is router quality and coverage — a mesh router system in a large home provides more reliable connectivity than a single fast router with dead zones.
FAQ
What is the difference between a smart home hub and a smart home platform?
A smart home hub is a physical device that communicates with Zigbee, Z-Wave, or Thread devices and processes commands locally. Examples include Samsung SmartThings Hub, Hubitat Elevation, and Amazon Echo (for Zigbee). A smart home platform is the software ecosystem and app that controls everything. Examples include Google Home, Amazon Alexa, and Apple HomeKit. A platform can work without a physical hub (using cloud processing), while a hub provides local processing capability.
Can I mix devices from different brands in one smart home system installation?
Yes, with conditions. Devices from different brands work together when they support the same platform or protocol. For example, a Philips Hue bulb, an Ecobee thermostat, and an August Smart Lock all support Amazon Alexa and can be controlled together through the Alexa app. Matter-certified devices offer the broadest cross-platform compatibility available today.
What is Matter and do I need it for smart home installation?
Matter is an open-source smart home connectivity standard that allows devices to work across Amazon Alexa, Google Home, Apple HomeKit, and Samsung SmartThings without compatibility concerns. You do not need Matter to build a smart home today, but choosing Matter-certified devices when available protects your investment as the industry shifts toward this universal standard.
How many smart devices can my router handle?
Standard home routers handle 20–50 connected devices. Wi-Fi 6 routers handle 75–100+ devices. Mesh router systems scale further. If your smart home installation exceeds your router’s capacity, you will see slowdowns and device dropouts. Upgrade your router before expanding beyond 20–30 smart devices on an older router.
Do smart home devices increase energy bills?
Smart home devices themselves use minimal power in standby — typically 0.5–2 watts per device. The energy savings from smart thermostats, automated lighting shutoffs, and smart plugs that cut phantom power from idle appliances typically exceed the power consumption of the devices by a significant margin. The U.S. Department of Energy estimates smart thermostats alone can reduce HVAC energy use by 10–15%.
What happens to my smart home if I switch platforms?
Switching platforms (for example, from Amazon Alexa to Google Home) requires re-pairing devices to the new platform. Most physical devices are not locked to a single platform — they simply need to be set up again in the new app. Automations and routines must be rebuilt from scratch in the new platform. This process takes a few hours for a typical home. Devices that are not compatible with your new platform will need to be replaced.
Key Takeaways
- Smart home system installation involves four phases: infrastructure assessment, platform selection, device installation, and automation programming.
- Most Wi-Fi-based smart home installations are DIY-friendly. Smart switches and thermostats require basic electrical work.
- Assess your Wi-Fi coverage and check for neutral wires before purchasing any devices.
- Choose a platform based on your phone ecosystem: Amazon Alexa for broad device support, Google Home for Android users, Apple HomeKit for iPhone users who want privacy.
- Start with smart lighting and a thermostat for the best introduction to home automation.
- Use a separate IoT Wi-Fi network for all smart devices to protect your personal data.
- Matter-certified devices provide the broadest cross-platform compatibility going forward.
- Hire a certified professional installer (CEDIA-certified) for hardwired systems, whole-home audio, or complex integrations.
- Professional installation costs range from $500 to $2,000+ for whole-home basic setups.
- Document your device names, accounts, and network settings from day one.
Conclusion
Smart home system installation is one of the most rewarding technology projects you can take on. The barrier to entry is lower than most people expect — a basic, functional setup covering lights, climate, and security can be running in a single afternoon for under $300.
The key is to plan before you buy, choose a platform that fits your existing devices, and build incrementally. A smart home is not a single purchase — it is a system that grows with your needs.
Start with a smart thermostat and a few smart bulbs. Get comfortable with your platform’s app and automation features. Then expand room by room at a pace that suits your budget.
For larger projects, custom builds, or homes that need wiring updates, work with a CEDIA-certified installer who can design a system that matches your home’s specific layout and your household’s priorities.
From setting up your first smart bulb to planning a complete whole-home integration, this guide gives you everything you need to make informed decisions and get your smart home working correctly.