




Losing important files can be stressful — but in most cases, those files are still recoverable if you act quickly and use the right tool.
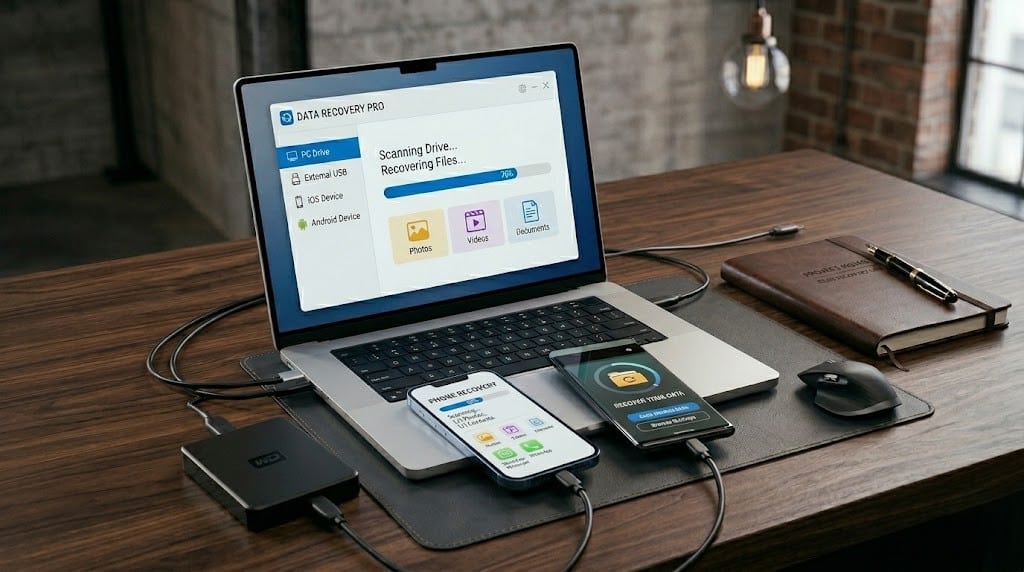
Data recovery software scans your storage device for files that have been deleted, lost, formatted, or corrupted — and restores them before new data permanently overwrites their location. It works across PCs, laptops, HDDs, SSDs, USB drives, SD cards, Android devices, and iPhones.
Whether your files disappeared after an accidental deletion, a system crash, a failed Windows update, or an unintentional format — the right recovery tool can retrieve them.
This guide covers the best data recovery software for every device type, situation, and budget — including free and paid options tested against real data loss scenarios.
What Is Data Recovery Software?
Data recovery software is a tool that scans storage devices for files that have been deleted, lost, formatted, or corrupted — and restores them to an accessible state.
When you delete a file, your operating system does not immediately erase it. Instead, it marks that storage space as available for new data — while the original file remains physically present on the drive. Data recovery software finds and retrieves these files before new data writes over them.
Think of it like a library that removes a book from its index but leaves the book on the shelf. The book is still there — it is simply no longer listed.
Recovery software works across a wide range of storage devices — HDDs, SSDs, USB drives, SD cards, and mobile storage on both Android and iPhone.
Recovery limitations exist: on SSDs with TRIM enabled, on fully overwritten files, and on physically damaged drives — success is not always guaranteed.
How Does Data Recovery Software Work?
Understanding how recovery works helps set realistic expectations — and explains why acting quickly after data loss is so important. Here is what happens at each stage.
The File Deletion Process
When you delete a file and empty the Recycle Bin, Windows does not physically erase the data from your drive. It simply removes the file’s entry from the file system index — the directory that tells the OS where each file is stored.
The actual data remains physically present on the drive until new files are written to the same storage space. Data recovery software locates these orphaned files by scanning the raw storage directly, bypassing the file system index entirely.
This is why the golden rule of data recovery is consistent across every tool and every scenario: stop using the device immediately after data loss. Every file you save, every application you run, every website you visit writes new data — and that new data can permanently overwrite the file you are trying to recover.
Quick Scan vs Deep Scan
Recovery software typically offers two scanning methods — and choosing the right one for your situation saves significant time.
Quick Scan:
- Reads the file system structure and metadata that Windows still partially recognizes
- Completes in minutes
- Best for recently deleted files where the file system index is still partially intact
- Recovers files with their original names and folder structure in most cases
Deep Scan:
- Ignores the file system entirely and scans every storage sector of the drive sequentially
- Uses file signature recognition — identifying file types by their unique binary header patterns rather than their file system entries
- Takes significantly longer — hours on large drives
- Required after formatting, partition loss, severe corruption, or file system damage
- Often recovers files without their original names — returned as generic file type labels (e.g., FILE001.jpg)
Which to use: Start with a Quick Scan. If it does not find the files you need — run a Deep Scan on the same drive without saving anything to it between scans.
File System Scanning
Every storage device uses a file system — a structure that organizes how data is stored and retrieved. Common file systems include NTFS (Windows), FAT32 (older drives and USB), exFAT (SD cards and external drives), APFS (Apple), and ext4 (Linux).
Data recovery software reads these file systems to reconstruct which files existed, where they were stored, and whether their data blocks are still intact. When the file system itself is damaged or missing — after a format or corruption event — the software switches to signature-based deep scanning to locate files without relying on the directory structure at all.
The quality of a recovery tool’s file system support directly determines how much of the original folder structure and file naming it can preserve during recovery.
Why Overwritten Files Cannot Be Recovered
Once new data is physically written to the same storage sectors that previously held your deleted file, the original data is gone. No recovery software — regardless of price or claimed capability — can reconstruct data that has been physically replaced by new content.
This is why installation of recovery software on the same drive being recovered is a critical mistake. Installing any software writes new data to the drive — potentially overwriting the exact sectors holding your deleted files before the scan even begins.
Always install recovery software on a separate drive — never on the drive containing your lost files.
Why SSD Recovery Is Different — The TRIM Problem
SSD recovery presents a unique challenge that HDD recovery does not face.
When you delete a file on an SSD, the operating system sends a TRIM command to the drive. TRIM instructs the SSD to immediately clear the deleted file’s storage blocks — preparing them for new data. This happens in the background without any user action.
On an HDD, deleted data remains physically present until overwritten by new files — giving recovery software time to locate it. On an SSD with TRIM enabled, those storage blocks are cleared almost immediately, leaving nothing for recovery software to find.
| Storage Type | Deleted Data Remains | TRIM Effect | Recovery Chance |
| HDD | Yes — until overwritten | Not applicable | High if acted on quickly |
| SSD (TRIM on) | No — cleared almost immediately | Severe | Low to none |
| SSD (TRIM off) | Yes — until overwritten | Not applicable | Moderate to high |
| USB/SD Card | Yes — until overwritten | Varies by device | Moderate |
Practical implication: If your data loss occurred on an SSD — run a recovery scan immediately, before the operating system has time to process pending TRIM commands. Every second the SSD remains powered and connected to the OS reduces recovery chances further.
Best Data Recovery Software for PC
Choosing the right data recovery software for PC depends entirely on your specific situation — the type of data loss, the storage device involved, and your level of technical experience. Here are the five strongest options available in 2026, each suited to a different use case.
1. EaseUS Data Recovery Wizard
Best for: Beginners recovering accidentally deleted files or formatted drives on Windows
Overview: EaseUS Data Recovery Wizard is one of the most widely used data recovery tools for PC — and for good reason. Its three-step recovery process (select location → scan → recover) requires no technical knowledge, making it the most accessible option for first-time users facing data loss.
Strengths:
- Clean, beginner-friendly interface with clear guidance throughout
- Strong recovery performance on NTFS file systems — the standard for modern Windows PCs
- Supports recovery during active scan — no need to wait for full completion
- Covers a wide range of devices: HDDs, SSDs, USB drives, SD cards, and basic RAID setups
- 2 GB free recovery limit on Windows — sufficient for recovering critical documents or photos
Limitations:
- Recovery of large files is slower than competing tools
- Struggles with Linux-formatted drives (ext3, ext4)
- File preview limited in the free version
- Subscription pricing is higher than most competitors — monthly plan particularly poor value
- Frequent in-app purchase prompts interrupt the recovery workflow
Experience level: Beginner to intermediate
2. Disk Drill
Best for: Users who need strong all-round recovery performance with additional drive health tools
Overview: Disk Drill combines powerful recovery algorithms with a modern, accessible interface — making it effective for both casual users and more experienced ones. Beyond basic file recovery, it includes S.M.A.R.T. drive health monitoring, byte-to-byte disk imaging, and a dedicated Advanced Camera Recovery module for fragmented video reconstruction.
Strengths:
- Highest overall recovery performance across multiple file systems and device types in independent testing
- Recovers files from severely corrupted drives that Windows Explorer cannot read at all
- Restores original folder structure more reliably than most competitors
- Single license covers both Windows and macOS
- Free tools included at no cost: S.M.A.R.T. monitoring, storage cleanup, and drive backup
- Supports NAS, TrueNAS, and mobile device recovery on Mac version
Limitations:
- Free Windows version limited to 100 MB recovery — lower than EaseUS and Stellar free tiers
- No phone support available
- Cannot create bootable recovery media directly
Experience level: Beginner to advanced
3. Recuva
Best for: Users on a tight budget needing basic file recovery from healthy drives
Overview: Recuva is the most accessible free data recovery software for PC — developed by Piriform, the company behind CCleaner. It has no recovery limit on its free version, making it genuinely useful for straightforward undelete tasks without any cost.
Strengths:
- Completely free for standard recovery with no file size or count restrictions
- Lightweight — minimal system resources required
- Wizard mode guides beginners through the entire recovery process
- Recovery chance indicator flags files with high, medium, or low probability of successful restoration
- Portable version available — runs without installation
Limitations:
- Below-average recovery performance compared to paid tools — 31% success rate in independent testing
- Cannot scan RAW or unrecognized drives — only works with mounted, readable file systems
- Does not recover original folder structure reliably
- No major updates since mid-2024 — lacks support for newer file system features
- Deep scan limited compared to commercial alternatives
Experience level: Beginner
4. Stellar Data Recovery
Best for: Users primarily recovering photos, videos, and media files — particularly from cameras and SD cards
Overview: Stellar Data Recovery is a well-established PC recovery tool with a particular strength in media file recovery. Its thumbnail gallery view makes browsing large volumes of recovered images and videos significantly faster than competing tools — and its corrupted video repair module adds genuine value for photographers and videographers.
Strengths:
- Thumbnail gallery view for recovered images and videos — unique among competitors
- Supports custom file signatures for recovering proprietary or obscure file formats
- Sector-by-sector disk imaging for safe recovery from unstable drives
- Corrupted video repair module available in higher license tiers
- RAID support available in Technician edition
Limitations:
- Overall recovery performance lower than Disk Drill and EaseUS in independent testing
- No free recovery on Mac version — preview only
- Pricing is relatively high compared to feature set — frequent discounts partially offset this
- Yearly subscription model with no monthly option at the Professional tier
- Full feature set only unlocked at costly higher tiers
Experience level: Beginner to intermediate
5. DMDE (DM Disk Editor and Data Recovery Software)
Best for: Advanced users and technicians recovering data from complex scenarios — RAID arrays, corrupted partitions, and damaged file systems
Overview: DMDE is the most technically capable tool on this list for users who understand disk architecture. Its combination of disk editing, partition recovery, RAID reconstruction, and deep file system scanning makes it the preferred choice for data recovery professionals handling cases that consumer tools cannot resolve.
Strengths:
- Advanced RAID reconstruction and partition table repair
- Hex editor for direct disk sector inspection and editing
- Supports an exceptionally wide range of operating systems including MS-DOS, Windows 98, and modern Linux
- Competitive pricing: Standard lifetime license at $48 — significantly cheaper than commercial alternatives
- Express license available for approximately $9 per month — low cost for one-time recovery tasks
- Can recover files while scan is still running
Limitations:
- Interface is outdated, cluttered, and overwhelming for non-technical users
- No S.M.A.R.T. monitoring or session management
- No mid-scan recovery preview in the same way consumer tools provide
- Limited file format support compared to Disk Drill and EaseUS
- Known to struggle with EXT4 file systems and very large SSDs in some configurations
Experience level: Advanced — not recommended for first-time users
Quick Comparison: Best Data Recovery Software for PC
| Tool | Best For | Free Recovery | Beginner Friendly | Price (Paid) |
| EaseUS Data Recovery | Formatted drives, beginners | 2 GB | ✅ Yes | From $69.95/year |
| Disk Drill | All-round performance | 100 MB (Windows) | ✅ Yes | $149 lifetime |
| Recuva | Budget users, basic recovery | Unlimited | ✅ Yes | Free / $24.95 Pro |
| Stellar Data Recovery | Photo and video recovery | 1 GB (Windows) | ✅ Yes | From $99.99/year |
| DMDE | Advanced/RAID recovery | 4,000 files/folder | ❌ Advanced only | From $48 lifetime |
Best Data Recovery Software for Mobile (Android & iPhone)
Mobile data recovery operates very differently from PC recovery — and most competitor blogs cover it poorly or skip it entirely. This section covers the best data recovery software for mobile devices, separated by platform, with a focus on the most common real-world scenarios: deleted photos, lost contacts, broken screen recovery, and app data loss.
Android Data Recovery Tools
Android recovery is more accessible than iPhone recovery because the platform allows deeper storage access — particularly on rooted devices. However, even without root access, several tools recover deleted photos, videos, contacts, and messages effectively.
1. Dr.Fone (Wondershare)
Best for: All-round Android and iPhone recovery — the most complete mobile recovery tool available
Overview: Dr.Fone is the most feature-rich mobile data recovery tool on this list. It covers Android and iPhone recovery, broken screen data extraction, WhatsApp and social media recovery, and system repair — all within a single application. Its broad device compatibility and beginner-friendly interface make it the closest mobile equivalent to Disk Drill on PC.
Strengths:
- Recovers deleted photos, videos, contacts, messages, WhatsApp data, and call logs
- Broken screen recovery module extracts data from Android devices with unresponsive displays — without needing to see or interact with the screen
- Supports over 6,000 Android device models
- iPhone recovery works directly from device, iTunes backup, or iCloud backup
- Preview before recovery — confirms files are intact before purchase
Limitations:
- Full recovery requires purchasing a license — preview is free but saving recovered files is not
- Pricing is among the highest on this list
- Root access required for deeper Android recovery on older devices
- Large software package — installs multiple modules simultaneously
Experience level: Beginner to intermediate
2. DiskDigger
Best for: Quick deleted photo and video recovery on Android without a computer
Overview: DiskDigger is a lightweight Android app that recovers deleted photos and videos directly on the device — no PC connection required. It is one of the few recovery tools that operates entirely from the phone itself, making it particularly useful when a computer is not immediately available after data loss.
Strengths:
- Free version recovers photos and videos without requiring root access
- Operates directly on the Android device — no PC needed
- Pro version unlocks recovery of additional file types: documents, audio, and APK files
- Fast scanning — results appear within minutes on most devices
- Simple interface accessible to any user regardless of technical experience
Limitations:
- Without root access, recovery is limited to photos and videos only
- Root access required for full file system scanning and deeper recovery
- Recovery quality varies significantly by Android version and manufacturer
- No iPhone support whatsoever
- PC-based recovery not available — phone-only operation limits advanced use cases
Experience level: Beginner
3. Tenorshare UltData for Android
Best for: Recovering WhatsApp messages, contacts, and app data from Android without root
Overview: Tenorshare UltData focuses specifically on recovering application data — WhatsApp conversations, deleted contacts, SMS messages, and call history — areas where most generic recovery tools perform poorly. It operates via PC connection and does not require root access for its primary recovery features.
Strengths:
- Recovers WhatsApp messages and attachments without root access
- Strong contact and SMS recovery — particularly useful after factory resets
- Broken Android recovery mode extracts data from crashed or unbootable devices
- Supports Google account data recovery in addition to on-device files
- Clean interface with clear step-by-step guidance
Limitations:
- Focused primarily on app data — less effective for media file recovery compared to Dr.Fone
- Requires PC connection for most recovery operations
- Free version limited to preview only — full recovery requires license purchase
- Pricing structure uses per-device licensing which adds up for multiple devices
Experience level: Beginner to intermediate
iPhone Data Recovery Tools
iPhone recovery is more restricted than Android recovery due to Apple’s security architecture. Most tools access iPhone data through one of three pathways: directly from the device, from an iTunes backup, or from an iCloud backup. Direct device scanning without a backup is the most powerful method — but requires the device to be functional and trusted by the recovery software.
4. iMobie PhoneRescue
Best for: iPhone data recovery including contacts, photos, messages, and app data — with or without a backup
Overview: PhoneRescue is one of the most capable iPhone-specific recovery tools available — offering direct device recovery, iTunes backup recovery, and iCloud backup recovery in a single application. Its ability to selectively recover individual items from iCloud without downloading and restoring the entire backup makes it particularly valuable when only specific files are needed.
Strengths:
- Selective iCloud recovery — retrieve individual files without restoring the entire backup
- Recovers contacts, photos, messages, call history, notes, WhatsApp data, and app data
- Works on both functional iPhones and devices with iOS system problems
- iOS repair module fixes stuck, frozen, or boot-looping iPhones without data loss
- Supports the latest iOS versions including iOS 17 and iOS 18
Limitations:
- iCloud recovery requires Apple ID credentials — two-factor authentication adds steps
- Free version limited to scanning and preview only
- Some app data recovery requires the original app to still be installed
- Interface less polished than Dr.Fone in some workflow areas
- Mac version slightly more stable than Windows version in complex recovery scenarios
Experience level: Beginner to intermediate
5. EaseUS MobiSaver
Best for: Beginner iPhone users recovering deleted photos and contacts quickly
Overview: EaseUS MobiSaver is the mobile companion to EaseUS Data Recovery Wizard — applying the same beginner-friendly three-step approach to iPhone data recovery. It is the most accessible iPhone recovery tool on this list for users with no prior experience with data recovery software.
Strengths:
- Extremely simple interface — three steps from launch to recovered files
- Recovers photos, videos, contacts, messages, notes, and WhatsApp data
- Supports direct device recovery, iTunes backup recovery, and iCloud recovery
- Free version allows scanning and preview before any purchase commitment
- Strong integration with the broader EaseUS software ecosystem
Limitations:
- Recovery performance below PhoneRescue and Dr.Fone in independent comparisons
- Free version limited to 2 GB recovery — lower limit than desktop EaseUS version
- Limited support for third-party app data beyond WhatsApp
- iCloud recovery slower than competing tools on large backup sizes
- Less frequent updates than other tools on this list
Experience level: Beginner
Mobile Recovery: Which Tool for Which Situation?
| Situation | Best Tool | Platform |
| Deleted photos — quick recovery | DiskDigger | Android |
| WhatsApp and app data recovery | Tenorshare UltData | Android |
| Broken screen data extraction | Dr.Fone | Android |
| All-round Android recovery | Dr.Fone | Android |
| iPhone deleted photos and contacts | EaseUS MobiSaver | iPhone |
| iPhone selective iCloud recovery | PhoneRescue | iPhone |
| Both Android and iPhone coverage | Dr.Fone | Both |
| Factory reset recovery | Tenorshare UltData | Android |
Important Note on Mobile Recovery
Mobile data recovery is significantly more dependent on timing than PC recovery. Android devices with TRIM-equivalent garbage collection and iPhones with Apple’s storage management actively clear deleted data faster than traditional HDDs. On both platforms — stop using the device immediately after data loss, enable airplane mode to prevent cloud sync from overwriting deleted files, and run a recovery scan before charging or installing any new applications.
Free vs Paid Data Recovery Software: Which Should You Choose?
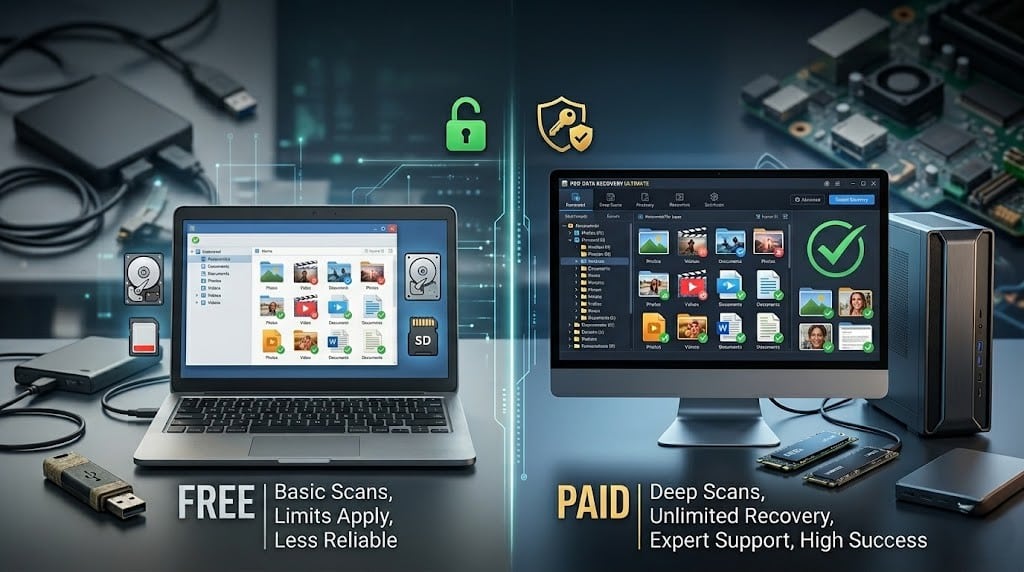
The choice between free and paid data recovery software is not always straightforward — and the right answer depends entirely on what you lost, where you lost it, and how critical the files are. Here is an unbiased breakdown of what each category actually delivers.
Feature Comparison Table
| Feature | Free Tools | Paid Tools |
| Recovery limit | Typically 500 MB – 2 GB | Unlimited |
| Quick scan | Available in most | Available in all |
| Deep scan | Basic or restricted | Full — including signature-based scanning |
| Partition recovery | Rare — mostly absent | Supported in most mid-range tools |
| RAW drive recovery | Not supported in most | Supported in advanced tools |
| File preview before recovery | Limited or none | Full preview in most paid tools |
| Original folder structure | Rarely preserved | Preserved in most cases |
| Technical support | Community forums only | Dedicated support — email or live chat |
| Update frequency | Infrequent | Regular — new file signatures and OS support |
| RAID recovery | Not available | Available in advanced tiers |
| Mobile recovery | Not available | Available in dedicated mobile tools |
| Success rate (independent testing) | 20–40% average | 60–95% depending on tool and scenario |
What Free Tools Do Well
Free data recovery software handles one scenario reliably — recently deleted files on healthy, mounted drives with intact file systems.
If you accidentally deleted a document, photo, or video from a functioning HDD or USB drive and ran a recovery scan within hours of the deletion, free tools like Recuva and the free tiers of EaseUS and Disk Drill can recover those files without spending anything.
Free tools are sufficient when:
- Files were deleted recently and the drive has not been heavily used since
- The drive is healthy, mounted, and recognized by Windows
- You need to recover a small volume of data — under 2 GB
- The loss involves simple deletion rather than formatting, corruption, or partition failure
- Budget constraints make paid tools impractical for the situation
Where Free Tools Fall Short
Free tools consistently fail in four specific scenarios that represent the majority of serious data loss cases:
Formatted drives: Most free tools rely on file system metadata to locate deleted files. After formatting, that metadata is gone — requiring signature-based deep scanning that free tools either restrict or do not support at all.
Corrupted or RAW drives: Drives showing as RAW or unrecognized in Windows require tools that can reconstruct file system structures from scratch. Recuva — the most capable free option — explicitly does not support RAW drives.
Large volume recovery: Free tier limits of 500 MB to 2 GB are quickly exhausted when recovering photo libraries, video projects, or full document archives. Reaching the limit mid-recovery and being unable to save remaining files is a common and frustrating outcome.
SSD recovery with TRIM: The narrow recovery window on TRIM-enabled SSDs requires the fastest, most aggressive scanning algorithms available — which are consistently reserved for paid versions.
What Paid Tools Add
Paid data recovery software earns its cost through three areas that free tools cannot match:
Recovery depth: Signature-based deep scanning, partition reconstruction, and RAW drive support dramatically increase the range of recoverable scenarios beyond simple deletion.
Recovery volume: Unlimited recovery removes the single most frustrating constraint of free tools — the ability to fully complete a recovery without hitting an artificial ceiling.
Support and reliability: Dedicated technical support, regular updates for new file signatures, and compatibility with new operating system versions ensure the tool works correctly when data loss occurs — which rarely happens at a convenient time.
Which Type Is Right for You?
| Your Situation | Recommended Option |
| Recently deleted files, healthy drive | Free tier sufficient |
| Formatted external drive or USB | Paid tool required |
| Corrupted or RAW drive | Paid tool required |
| SSD data loss | Paid tool — act immediately |
| Photo library or video project recovery | Paid tool — volume limits apply |
| Partition loss or system crash | Paid tool required |
| Mobile data recovery | Paid mobile tool required |
| RAID or NAS recovery | Advanced paid tool required |
| One-time recovery task, tight budget | Free tier first — upgrade if needed |
| Business or professional use | Paid tool — dedicated support essential |
The Practical Approach
Most paid tools offer a free scan and preview before requiring any payment. This means you can run a full scan, confirm your files are recoverable, and only then decide whether to purchase.
Use this workflow:
- Download the free version of Disk Drill or EaseUS
- Run a deep scan on your affected drive
- Preview the results to confirm your files are present and intact
- Upgrade to the paid version only if the files are confirmed recoverable and exceed the free recovery limit
This approach eliminates the risk of paying for a tool that cannot recover your specific files — and costs nothing unless recovery is confirmed possible.
Which Data Recovery Software Is Best for Different Situations?
Not every data loss scenario requires the same tool. Using the wrong software for your specific situation wastes time — and in cases involving SSDs or failing drives, it can reduce recovery chances further. Here is a practical guide matching the right tool to the right scenario.
Situation 1 — Accidentally Deleted Files
Best tool: Recuva (free) or EaseUS Data Recovery Wizard
Why it fits: Accidental deletion from a healthy, mounted drive is the simplest recovery scenario — and the one where free tools perform most reliably. The file system index is still largely intact, the deleted file’s data blocks have not been overwritten, and a quick scan is usually sufficient to locate and restore the file within minutes.
Recuva handles this scenario entirely for free with no recovery limit. EaseUS covers the same scenario with a cleaner interface and a 2 GB free tier — better suited for users recovering multiple files simultaneously.
What to do:
- Stop using the drive immediately after realizing the deletion
- Run Recuva or EaseUS quick scan on the affected drive
- Filter results by file type and date to locate the specific file quickly
- Save recovered files to a different drive — never back to the same one
Avoid: Deep scan for this scenario — it is unnecessary, takes significantly longer, and returns results without original file names.
Situation 2 — Formatted Drives
Best tool: EaseUS Data Recovery Wizard or Disk Drill
Why it fits: Formatting removes the file system structure but leaves the underlying data physically present on the drive — provided it is a quick format rather than a full format. Recovery after formatting requires signature-based deep scanning, which both EaseUS and Disk Drill handle effectively across NTFS, FAT32, and exFAT formatted drives.
EaseUS produces faster scan times on formatted NTFS drives specifically. Disk Drill preserves more of the original folder structure after formatting — making it easier to identify and organize recovered files.
What to do:
- Do not use the formatted drive at all before scanning — every write operation reduces recoverable data
- Run a deep scan rather than a quick scan — the file system metadata no longer exists
- Be prepared for recovered files to return without original names if the format was aggressive
- Recover to a separate physical drive immediately after scan completion
Avoid: Recuva — it explicitly cannot scan RAW or reformatted drives without a readable file system structure.
Situation 3 — Corrupted SSD
Best tool: Stellar Data Recovery or DMDE
Why it fits: SSD corruption presents two simultaneous challenges — a damaged file system that prevents normal drive access, and the TRIM feature that may have already cleared some deleted data blocks. This scenario requires a tool capable of working with RAW, unrecognized, or partially readable drives while applying aggressive signature-based scanning to find whatever data TRIM has not yet cleared.
Stellar Data Recovery handles corrupted SSDs through sector-by-sector imaging — creating a safe copy of the drive to scan rather than working directly on the unstable original. DMDE offers deeper partition table reconstruction for cases where the drive’s entire file system structure has collapsed.
What to do:
- Power off the SSD immediately — every second it remains powered with TRIM active reduces recovery chances
- Use Stellar’s disk imaging feature to create a byte-for-byte copy before scanning
- Scan the image file rather than the original corrupted SSD
- Run a deep scan on the image — quick scan will find nothing on a corrupted drive
- If Stellar cannot mount the image — switch to DMDE for lower-level partition reconstruction
Avoid: Recuva and free EaseUS tier — neither handles RAW or unrecognized drives effectively.
Situation 4 — Mobile Photo Recovery
Best tool: DiskDigger (Android) or PhoneRescue (iPhone)
Why it fits: Mobile photo recovery requires platform-specific tools — PC recovery software cannot access mobile storage directly in most cases. DiskDigger operates entirely on the Android device itself, requiring no PC connection, and recovers deleted photos within minutes through its free version. PhoneRescue accesses iPhone photo libraries through direct device connection, iTunes backup, or selective iCloud recovery — whichever pathway is available.
For broken-screen scenarios specifically — where the device is functional but the display is unresponsive — Dr.Fone’s broken screen recovery module is the only tool on this list that extracts data without requiring any on-screen interaction from the user.
What to do for Android:
- Enable airplane mode immediately to prevent cloud sync from overwriting deleted photos
- Install DiskDigger directly from the Play Store
- Run a basic photo scan without root access first
- If basic scan returns no results — consider rooting the device for deeper storage access
What to do for iPhone:
- Enable airplane mode to pause iCloud Photo Library sync
- Connect iPhone to PC and launch PhoneRescue
- Run direct device scan first before attempting iCloud recovery
- Use selective recovery to retrieve only the specific photos needed — faster than full backup restoration
Situation 5 — RAID or NAS Recovery
Best tool: Disk Drill or DMDE
Why it fits: RAID and NAS recovery is the most technically demanding scenario on this list — involving multiple drives, complex array configurations, and interdependent data blocks that must be reconstructed in the correct sequence before any files can be recovered. A single incorrect RAID parameter during reconstruction can produce corrupted output even from physically healthy drives.
Disk Drill supports RAID 0, RAID 1, RAID 5, and JBOD configurations — along with NAS devices from Synology, QNAP, Netgear, and TrueNAS. Its interface guides users through array parameter input with significantly less friction than DMDE. DMDE offers deeper manual control over RAID reconstruction for technicians who understand array geometry and can input parameters manually — making it the preferred choice for professionals handling unusual or non-standard configurations.
What to do:
- Do not attempt to rebuild or repair the RAID array using the NAS management interface — this risks overwriting recoverable data
- Remove the drives from the NAS and connect them individually to a PC
- Create byte-for-byte images of each drive before attempting any reconstruction
- Input the correct RAID parameters: level, block size, disk order, and stripe size
- Scan the reconstructed virtual array rather than individual drives
- If RAID parameters are unknown — use Disk Drill’s automatic RAID detection feature before attempting manual configuration
Avoid: EaseUS, Recuva, and Stellar standard editions — none support RAID reconstruction in their base tiers.
Situation-Based Recommendation Summary
| Data Loss Situation | Best Free Option | Best Paid Option | Experience Required |
| Accidental deletion | Recuva | EaseUS Data Recovery | Beginner |
| Formatted drive | EaseUS free tier (2GB) | Disk Drill / EaseUS Pro | Beginner |
| Corrupted SSD | Disk Drill preview | Stellar / DMDE | Intermediate |
| Mobile photo recovery | DiskDigger (Android) | Dr.Fone / PhoneRescue | Beginner |
| RAID / NAS recovery | DMDE (limited free) | Disk Drill / DMDE Pro | Advanced |
| Broken screen recovery | None available free | Dr.Fone | Beginner |
| Partition loss | TestDisk (free) | DMDE / Disk Drill | Intermediate |
| Factory reset recovery | None reliable | Tenorshare UltData | Beginner |
How to Recover Deleted Files Safely (Step-by-Step Guide)
Following the correct recovery process matters as much as choosing the right tool. These five steps apply to every data loss scenario — accidental deletion, formatting, corruption, or system crash — on any storage device.
Step 1 — Stop Using the Drive Immediately
Why it matters: This is the single most important step in the entire recovery process — and the one most users skip because they do not realize the damage being done. Every action you take on the affected drive after data loss risks permanently overwriting the files you are trying to recover.
Browsing the internet, running applications, saving new files, and even simply leaving Windows running all write new data to the drive continuously. Each write operation can land on the exact storage sectors holding your deleted files — replacing them permanently with no possibility of recovery.
What to do:
- Stop all activity on the affected drive the moment you realize data has been lost
- Do not save anything to the drive — including the recovery software itself
- Do not run Windows Update, cloud sync, or any background process that writes to the drive
- For mobile devices — enable airplane mode immediately to prevent cloud services from syncing and overwriting deleted data
- If the drive is an internal system drive — shut the PC down and boot from a USB recovery environment instead of continuing to use Windows normally
Step 2 — Install Recovery Software on a Different Drive
Why it matters: Installing recovery software on the same drive containing your lost files is one of the most common and damaging mistakes users make. The installation process writes hundreds of megabytes of new data to the drive — potentially overwriting the exact sectors holding the files you need before the scan even begins.
What to do:
- Download your chosen recovery software on a separate PC if possible
- Install it to a different physical drive — an external USB drive, a secondary internal drive, or a separate partition on a healthy drive
- For internal system drive recovery — create a bootable USB recovery drive using tools like Disk Drill’s bootable recovery feature or use a live USB environment
- Never use the affected drive as either the installation location or the download destination
Example: Lost files are on your C: drive → Download and install the recovery tool on your D: drive or an external USB → Scan the C: drive from there.
Step 3 — Run a Quick Scan First
Why it matters: A quick scan reads the file system metadata that Windows still partially recognizes — locating recently deleted files in minutes without performing a full sector-by-sector analysis. For simple deletion scenarios on healthy drives, a quick scan recovers files with their original names and folder structure intact — significantly faster than a deep scan.
What to do:
- Launch your recovery software and select the affected drive as the scan target
- Choose Quick Scan as the scan type
- Wait for the scan to complete — this typically takes 2–10 minutes depending on drive size
- Browse the results and search for your specific files by name, file type, or date modified
- Preview files before recovering them — confirm they are intact and uncorrupted
- If your files appear in the results — proceed directly to Step 5
When quick scan is sufficient:
- Files deleted recently from a healthy, mounted drive
- Drive is still recognized and accessible by Windows
- File system structure is intact
Step 4 — Run a Deep Scan If Quick Scan Fails
Why it matters: When quick scan does not find your files — either because the file system is damaged, the drive was formatted, or the files were deleted long ago — a deep scan performs a complete sector-by-sector analysis of the entire drive. It identifies files by their unique binary signatures rather than relying on the file system directory, locating data that quick scan cannot see.
What to do:
- Return to the scan options and select Deep Scan on the same drive
- Allow the scan to run to completion — do not interrupt it mid-process
- Deep scans on large drives (1 TB+) can take 2–8 hours depending on drive health and tool
- Expect recovered files to return without original file names in many cases — they will appear as generic labels (FILE001.jpg, FILE002.docx)
- Use the file preview feature to identify your specific files among the results
- Apply file type and date filters to narrow down thousands of results to the files you need
Important: Do not save anything to the affected drive between the quick scan and deep scan — even a small write operation can overwrite files the deep scan would otherwise find.
Step 5 — Save Recovered Files to a Different Location
Why it matters: Saving recovered files back to the same drive they were lost from is the final and most avoidable mistake in the recovery process. Writing recovered data to the source drive risks overwriting other files that have not yet been recovered — and in worst-case scenarios, the drive itself may be failing, making it an unreliable destination for any data.
What to do:
- Select all confirmed files from the scan results
- Choose a recovery destination on a completely separate physical drive — an external USB drive, a secondary internal drive, or cloud storage
- Never save to the same drive being scanned — even if it appears to have sufficient free space
- After recovery is complete — verify each file opens correctly before considering the recovery finished
- Once verified — back up the recovered files immediately to at least two separate locations
Post-recovery checklist:
- ✅ All target files confirmed present in scan results
- ✅ Files previewed and confirmed intact before recovery
- ✅ Recovery destination is a separate physical drive
- ✅ Recovered files open and function correctly after saving
- ✅ Files backed up to a second location immediately after recovery
Complete Recovery Process Summary
| Step | Action | Time Required |
| Step 1 | Stop using the affected drive | Immediate |
| Step 2 | Install recovery software on a separate drive | 5–10 minutes |
| Step 3 | Run quick scan | 2–10 minutes |
| Step 4 | Run deep scan if needed | 2–8 hours |
| Step 5 | Save recovered files to a different location | Varies by file volume |
Critical rule that applies to every step: The affected drive should never be written to at any point during this process — from the moment data loss occurs until every file has been successfully recovered and verified on a separate drive. One accidental write to the source drive can undo hours of careful recovery work.
Common Reasons Data Recovery Fails
Understanding why recovery fails is as important as knowing how to attempt it. Every competitor blog overpromises recovery success — this section gives you realistic expectations before you begin.
SSD TRIM Feature
As explained earlier, TRIM instructs the SSD to clear deleted data blocks almost immediately — leaving nothing for recovery software to scan. On modern SSDs with TRIM enabled and an active OS, recovery chances drop significantly within minutes of deletion.
Overwritten Files
Once new data occupies the same physical storage sectors as your deleted file, that file is permanently gone. No recovery tool — regardless of price or claimed capability — can reconstruct data that has been physically replaced. This is why continuing to use the affected drive after data loss is the most damaging mistake a user can make.
Physical Drive Damage
Software recovery tools only work on logically damaged drives — drives where the data is intact but inaccessible due to deletion, formatting, or corruption. When a drive has suffered physical damage — a failed read head, burnt controller board, or damaged platters — software cannot reach the data at all. Physical recovery requires professional cleanroom services, not consumer software.
Corrupted File System
Severe file system corruption — particularly after interrupted formatting, power loss during writes, or malware attacks — can damage the structural metadata that recovery tools use to locate files. When both the file system and the underlying data sectors are damaged simultaneously, even deep scanning may return incomplete or unreadable results.
Honest assessment: Data recovery software works reliably in logical data loss scenarios — deletion, accidental formatting, and mild corruption — on healthy drives acted on quickly. It cannot overcome physical damage, TRIM-cleared SSDs, or files that have already been overwritten. Recognizing which category your situation falls into before purchasing any tool saves both time and money.
Real-World Scenarios: Data Recovery in Practice
The most effective way to understand what data recovery software can and cannot do is to see it applied to situations that real users face. Here are four scenarios — each with a different outcome — that illustrate exactly how recovery works in practice.
Scenario 1: Recovering Photos From a Formatted SD Card
A photographer returns from a weekend shoot with several hundred photos on a 64GB SD card. Back at their desk, they insert the card into their laptop to transfer the files — and accidentally click Format instead of Eject in Windows Explorer. The format completes in seconds. Every photo from the shoot appears to be gone.
Panicking, they immediately remove the SD card from the laptop and do not insert it again. No new photos are taken on the card. No files are transferred to it.
What actually happened: The quick format removed the SD card’s file system index — but left every photo’s data physically present on the card. Because the photographer stopped using the card immediately, none of those data sectors had been overwritten.
What happened next: Running EaseUS Data Recovery Wizard’s deep scan on the SD card returned 94% of the original photos — including RAW format files from the camera. The remaining 6% were partially overwritten by the format process itself writing the new file system structure. All recovered photos were saved to the laptop’s internal drive before the SD card was touched again.
Key lesson: The outcome was positive because of one decision — stopping use of the card immediately. Had the photographer continued shooting on the same card after the accidental format, every new photo written would have permanently replaced the originals.
Scenario 2: Recovering Files After a Windows System Crash
A freelance writer is working on a deadline when their Windows PC crashes mid-session — a combination of an unstable Windows update and a failing RAM stick. On reboot, Windows enters an automatic repair loop and cannot load the desktop. The writer’s entire working documents folder — three months of client work — appears inaccessible.
The writer does not reinstall Windows. They do not run chkdsk or attempt any repair tool that writes to the system drive. Instead, they remove the internal HDD from the PC and connect it to a second computer as an external drive using a USB-to-SATA adapter.
What actually happened: The Windows installation was corrupted — but the HDD itself was physically healthy. The documents were never deleted — they were simply inaccessible because the OS that normally provided access to them could no longer load. This was a logical access problem, not a data loss problem.
What happened next: Connecting the drive to a second PC allowed Windows File Explorer on that machine to read the drive’s file system directly. The documents folder was fully visible and copied to the second PC without any recovery software needed. Disk Drill was then used to deep scan the drive and recover an additional 40 GB of older deleted project files that the writer had not realized were still present on the drive.
Key lesson: A system crash does not automatically mean data loss. When Windows cannot boot, the data is frequently still intact — accessible by connecting the drive to another machine. Recovery software becomes necessary only when the drive itself is damaged or the files were actually deleted or corrupted.
Scenario 3: Recovering Data From a Broken Android Phone
A user drops their Android phone on a concrete floor. The display shatters completely — producing no image whatsoever. The phone powers on, makes sounds, and vibrates normally — confirming the device itself is functional — but the broken display makes it impossible to interact with. Three years of photos, contacts, and WhatsApp conversations are stored on the device with no recent backup.
The user attempts to connect the phone to a PC via USB but Windows shows only a charging connection — because the phone’s lock screen requires touch interaction to authorize data transfer, and the broken display makes that interaction impossible.
What actually happened: The data was entirely intact — the phone was functioning normally behind the broken screen. The challenge was not recovery but access — getting the data off a functional device that could not be interacted with through normal means.
What happened next: Dr.Fone’s broken screen recovery module was used — a feature specifically designed for this scenario. It established a deeper device connection through Android’s debugging protocol, bypassed the lock screen authorization requirement, and extracted photos, contacts, and WhatsApp data directly to the PC without requiring any on-screen interaction from the user. The entire extraction took 45 minutes and recovered 100% of the targeted data.
Key lesson: A broken screen is not a data loss scenario — it is an access scenario. The correct tool for this situation is not a standard recovery scanner but a mobile extraction tool with dedicated broken screen support. Using generic Android recovery tools that require screen interaction on this type of case produces no result.
Scenario 4: SSD Recovery Failure Due to TRIM
A video editor accidentally deletes a folder containing 80GB of raw project footage from their NVMe SSD. They realize the mistake approximately 20 minutes after the deletion — after the editing software has been running continuously, Windows has been actively syncing files to OneDrive, and several autosave operations have written new data to the same drive.
They immediately download Disk Drill, run a deep scan on the NVMe SSD, and wait three hours for results. The scan returns fragments — small pieces of video files — but no complete, playable footage files. The 80GB folder is not recovered.
What actually happened: Three simultaneous factors eliminated recovery chances within the 20-minute window. First, the NVMe SSD’s TRIM feature had already processed the deletion command and cleared a significant portion of the deleted data blocks. Second, the OneDrive sync process had written new files to the drive — physically overwriting sectors that previously held the footage. Third, the autosave operations from the editing software had written additional data to the same storage space.
By the time the recovery scan ran, the data was genuinely gone — not hidden or inaccessible, but physically replaced. No recovery tool could retrieve it.
What happened next: The user contacted a professional data recovery lab as a last attempt. The lab confirmed the same outcome — TRIM had processed the deletion and overwriting had completed before any recovery attempt was made. The footage was unrecoverable. The project had to be rebuilt from the original source files held by the client.
Key lesson: This scenario illustrates the harsh reality of SSD data loss more clearly than any explanation. The 20-minute gap between deletion and recovery attempt — filled with active system processes — was enough to make the data permanently unrecoverable. On an NVMe SSD with TRIM enabled, the recovery window is measured in seconds to minutes, not hours. The moment data is deleted on an SSD — every second the system remains running reduces recovery chances further.
Pattern across all four scenarios: Scenarios 1 and 2 produced successful outcomes because the user stopped further writes to the affected storage immediately. Scenario 3 succeeded because the correct tool was matched to the specific access problem. Scenario 4 failed because active system processes continued writing to a TRIM-enabled SSD during the critical window between deletion and recovery attempt. The single most consistent factor across every successful data recovery outcome is the speed and completeness of stopping all writes to the affected device the moment data loss is recognized.
Is Data Recovery Software Safe?

Legitimate data recovery software downloaded from official developer websites is safe to use. Reputable tools use non-destructive scanning methods — they read your drive without modifying it, leaving your data exactly as it was before the scan began.
The risks come from one specific source: pirated or cracked recovery tools.
Cracked versions of paid recovery software are among the most common malware delivery methods in the tech tools category. They are distributed through file-sharing sites and unofficial download pages — often appearing identical to the legitimate product. Installing a cracked recovery tool on a drive containing sensitive data exposes every file on that drive to a malicious process that has direct, deep-level storage access.
Follow these three rules for safe recovery:
- Download only from the official developer’s website — never from third-party download aggregators or file-sharing platforms
- Verify the download using the developer’s published checksum where available
- Check independent reviews on established platforms before installing any unfamiliar tool
Privacy note: Recovery software by nature accesses every file on your drive — including sensitive documents, photos, and credentials. This makes the trustworthiness of the developer more important than with almost any other software category. Stick to established tools with verifiable reputations and transparent privacy policies.
How to Prevent Data Loss
Data recovery is always a last resort. These five habits eliminate the majority of data loss scenarios before they occur.
Enable Cloud Backup
Set up automatic cloud backup through OneDrive, Google Drive, or Backblaze for continuous file protection. Cloud backup runs silently in the background — ensuring a recoverable copy exists even when local storage fails completely.
Use Windows File History
Enable File History in Windows Settings to automatically save versions of your files every hour to an external drive. This single feature recovers accidentally overwritten or deleted files in seconds — without any recovery software needed.
Monitor SSD and HDD Health
Install CrystalDiskInfo (Windows) and check drive health monthly. S.M.A.R.T. warnings — reallocated sectors, pending sectors, or uncorrectable errors — signal imminent drive failure weeks before it occurs, giving you time to back up before data loss happens.
Avoid Sudden Shutdowns
Always shut down Windows properly rather than using the power button. Forced shutdowns during active write operations corrupt file system structures and damage partially written files — particularly on SSDs where interrupted writes can affect entire storage blocks.
Use Reliable Antivirus Protection
Ransomware and destructive malware are among the leading causes of sudden mass data loss. Maintain active antivirus protection through Windows Defender or a reputable third-party solution — and never open attachments or executable files from unverified sources.
Prevention principle: The 3-2-1 backup rule remains the most reliable data protection strategy available — keep three copies of important data, on two different storage types, with one copy stored offsite or in cloud storage. No recovery software is needed when this rule is consistently followed.
Frequently Asked Questions: Best Data Recovery Software
Q1. Can data recovery software recover permanently deleted files?
Yes — data recovery software can recover permanently deleted files as long as the storage space they occupied has not been overwritten by new data. When you permanently delete a file, the operating system marks that space as available but leaves the data physically intact until new files replace it. Running a recovery scan immediately after deletion — before using the drive further — produces the highest recovery success rate.
Q2. Which is the best free data recovery software for PC?
Recuva is the best completely free data recovery software for PC — offering unlimited recovery with no file size restrictions for standard deletion scenarios on Windows. For users who need a free tier with stronger deep scan performance, EaseUS Data Recovery Wizard and Disk Drill both offer 2 GB and 100 MB free recovery respectively — with full scan and preview available before any purchase. Choose based on your recovery volume and whether the drive is healthy or corrupted.
Q3. Can SSD data be recovered after deletion?
SSD data recovery is possible but significantly more limited than HDD recovery due to the TRIM feature — which instructs the SSD to clear deleted data blocks almost immediately after deletion. Recovery chances on a TRIM-enabled SSD drop sharply within minutes of deletion as the operating system processes pending TRIM commands in the background. The best approach is to power off the SSD immediately after data loss and run a recovery scan before the system has time to process further TRIM operations.
Q4. Is data recovery possible after formatting a drive?
Yes — data recovery after formatting is possible in most cases, provided the drive was quick formatted rather than fully formatted and no new data has been written to it since. Quick formatting removes the file system index but leaves the underlying data physically intact — recoverable through signature-based deep scanning using tools like EaseUS Data Recovery Wizard or Disk Drill. A full format, however, overwrites data across the entire drive and makes recovery significantly more difficult or impossible.
Q5. Which data recovery software is best for Android phones?
Dr.Fone by Wondershare is the best all-round data recovery software for Android — supporting deleted photos, contacts, messages, WhatsApp data, and broken screen data extraction across over 6,000 device models. For users who only need to recover deleted photos without a PC connection, DiskDigger is a free Android app that scans the device directly and returns results within minutes. Root access improves recovery depth on both tools but is not required for basic photo and contact recovery.
Conclusion
Data recovery software is a powerful last line of defense — but its success depends entirely on two factors: how quickly you act and the condition of your drive.
Whether you are recovering deleted photos from an SD card, restoring files after a Windows crash, or extracting data from a broken Android device — every tool covered in this guide has a clear, practical use case.
The single most important step: Stop using the affected device the moment you realize data has been lost. That one decision determines whether recovery succeeds or fails more than any software choice ever will.
Back up regularly — so recovery software stays a last resort, not a necessity.