


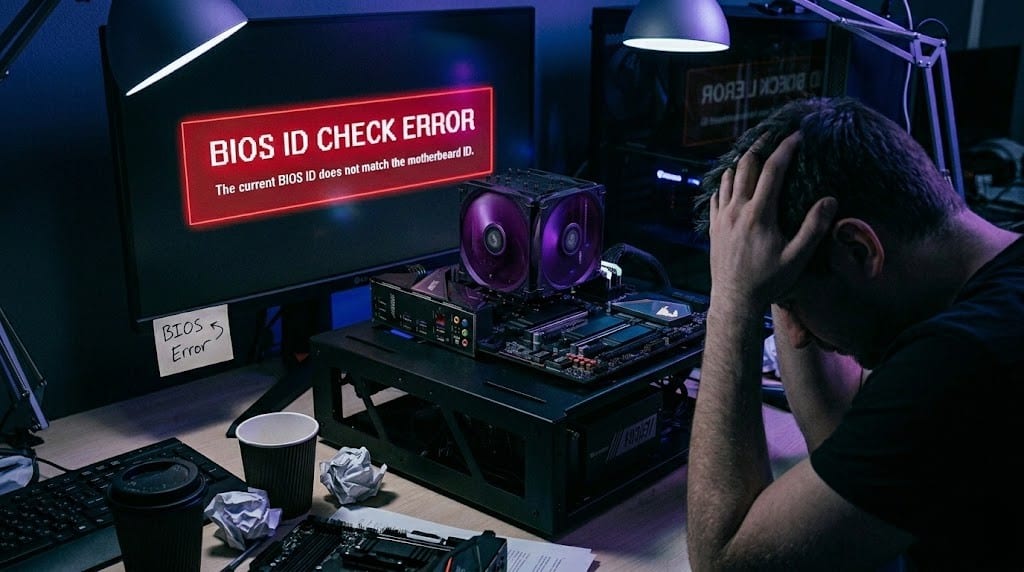
If your motherboard update is suddenly blocked by a BIOS ID check error, stop—and do not attempt to force the flash. This error simply means the BIOS file you are trying to install does not match your motherboard’s specific firmware ID. Your system runs this validation check as a strict safety measure to prevent permanent hardware damage.
The most common triggers are downloading the wrong BIOS file, using a version built for a different hardware revision (like Rev 1.0 instead of Rev 2.0), or working with a corrupted download. Fortunately, this is an easy fix once you know what to look for. This guide walks you through every cause and the exact steps to safely resolve it.
What Is BIOS ID Check Error?
Every Gigabyte motherboard carries a unique firmware ID — a digital identifier embedded in the board itself. When you attempt a BIOS update, the system compares this ID against the update file before allowing the flash to proceed.
If the two do not match, the system immediately blocks the update and throws the BIOS ID check error.
Think of it like trying to install an Android update on an iPhone. The file exists, the process starts — but the system recognizes an incompatibility and refuses to continue.
BIOS (Basic Input/Output System) is your motherboard’s core firmware — the first software that runs when you power on your system. Each BIOS file is built for a specific board model and revision. Feed it the wrong file and the ID validation fails before a single byte gets written.
This is a protective mechanism — not a malfunction.
Why BIOS ID Check Error Happens on Gigabyte Motherboards
Understanding the exact cause behind your error saves time and prevents further damage. Here are the five most common triggers — each with a real-world context.
1. Wrong BIOS File Downloaded
This is the single most common cause reported across tech forums. Gigabyte hosts multiple BIOS files for similar-sounding motherboard models — and downloading even a slightly incorrect file will trigger the ID check error instantly.
Real-world scenario: A user searches “B650M AORUS Elite AX BIOS update,” lands on the Gigabyte support page, and downloads the first file listed — without noticing it belongs to a different model variant. The flash attempt fails immediately at the ID validation stage.
2. Motherboard Revision Mismatch (Rev 1.0 vs Rev 1.1)
Gigabyte releases the same motherboard model across multiple hardware revisions — Rev 1.0, Rev 1.1, Rev 1.2 — each with its own dedicated BIOS file. These files are not interchangeable. Using a BIOS file built for Rev 1.0 on a Rev 1.1 board will always trigger the error.
Real-world scenario: Users frequently report downloading BIOS for the correct model name but the wrong revision — because the revision number is printed on the physical board, not always visible on the product box or purchase receipt. This catches even experienced builders off guard.
3. Corrupted BIOS Update File
A BIOS file that downloaded incompletely — due to a dropped internet connection, a browser interruption, or a corrupted USB drive — will fail the ID check even if the correct version was selected. The file exists on the drive but its contents are damaged.
Real-world scenario: A user downloads the correct BIOS file over an unstable connection, copies it to a USB, and attempts the flash. The ID check fails repeatedly despite using the right version — because the downloaded file itself is partially corrupted and no longer matches its original checksum.
4. Hardware Incompatibility After CPU or RAM Upgrade
Installing a new CPU generation or high-frequency RAM kit sometimes requires a BIOS update to support the new hardware. If the existing BIOS is too outdated to recognize the new components, it can cause firmware conflicts that surface as an ID check error during the update attempt.
Real-world scenario: A user upgrades from a Ryzen 5000 series CPU to a Ryzen 7000 series on an existing Gigabyte board. The board requires a BIOS update to support the new processor — but the current firmware is too old to process the update file correctly, producing the ID check error mid-flash.
5. OEM or Prebuilt Motherboard BIOS Restrictions
Motherboards shipped inside prebuilt PCs from manufacturers like HP, Dell, or Lenovo often run custom OEM BIOS versions — modified versions of the standard firmware locked to that specific system configuration. Attempting to flash a standard Gigabyte BIOS onto an OEM board will always fail the ID check.
Real-world scenario: A user identifies their prebuilt PC as containing a Gigabyte motherboard, downloads the matching BIOS from Gigabyte’s official site, and attempts the update — only to hit the ID check error. The board’s OEM firmware ID does not match any standard Gigabyte BIOS file, making a direct flash impossible without manufacturer support.
How to Fix BIOS ID Check Error on Gigabyte (Quick Fix)
Before moving into advanced troubleshooting, run through these steps first. The majority of BIOS ID check errors are resolved right here.
How to fix Gigabyte BIOS ID check error:
- Check your motherboard model and revision — locate the revision number printed directly on the physical board (e.g., Rev 1.0, Rev 1.1, Rev 1.2)
- Download the correct BIOS file — visit Gigabyte’s official support page, match your exact model AND revision number before downloading
- Format your USB drive to FAT32 — BIOS flashing requires FAT32 format; exFAT and NTFS will cause the process to fail
- Place only the BIOS file on the USB — remove all other files from the drive before attempting the flash
- Reset BIOS to default settings — press Delete at startup, load optimized defaults, save with F10 and restart
- Flash using Q-Flash — press F8 during startup to launch Gigabyte’s built-in Q-Flash tool and select your BIOS file from the USB
Result: If the correct revision-matched BIOS file is on a clean FAT32 USB, Q-Flash should accept the file and complete the update without triggering the ID check error.
Step-by-Step Fix Guide: BIOS ID Check Error (Gigabyte)
Work through these fixes in order — starting from the least invasive and moving toward advanced solutions only when needed.
Fix 1 — Verify Your Motherboard Model and Revision
Why it works: Gigabyte produces multiple revisions of the same motherboard model, each requiring its own specific BIOS file. Confirming your exact revision before downloading anything eliminates the most common cause of the ID check error.
Steps:
- Power off your system completely
- Locate the revision number printed directly on the motherboard — look near the model name on the board itself
- Note the exact revision: Rev 1.0, Rev 1.1, or Rev 1.2
- Cross-check this against your purchase documentation if needed
- Do not rely on the product box alone — board revisions are not always printed on packaging
Fix 2 — Download the Correct BIOS File
Why it works: Every Gigabyte BIOS file is locked to a specific model and revision combination. Downloading a file intended for even a slightly different revision will always fail the firmware ID validation check.
Steps:
- Visit Gigabyte’s official support page
- Search your exact motherboard model name
- Select the correct revision tab before downloading — this step is critical
- Download the latest stable BIOS version — avoid beta releases unless specifically required
- Verify the downloaded file size matches what Gigabyte lists — a mismatch indicates a corrupted download
Fix 3 — Format USB Drive to FAT32
Why it works: Gigabyte’s Q-Flash tool only reads USB drives formatted in FAT32. Drives formatted in exFAT or NTFS are invisible to Q-Flash, causing the process to fail before the ID check even runs.
Steps:
- Insert your USB drive into a working PC
- Open File Explorer, right-click the USB drive and select Format
- Set File System to FAT32
- Check Quick Format and click Start
- Copy only the BIOS file onto the freshly formatted drive — no folders, no other files
If you are unsure how to clear and set up your flash drive, you can refer to the official Microsoft File System Formatting Guide to safely convert your storage to FAT32 before copying the BIOS file
Fix 4 — Reset BIOS to Default Settings
Why it works: Existing BIOS misconfigurations — particularly custom boot settings or overclocking profiles — can interfere with the flash process. Restoring defaults clears all conflicts before the update attempt.
Steps:
- Restart your system and press Delete to enter BIOS
- Locate Load Optimized Defaults option
- Confirm the reset when prompted
- Press F10 to save and exit
- Attempt the BIOS update again after the restart
Fix 5 — Reflash BIOS Using Q-Flash
Why it works: Q-Flash is Gigabyte’s built-in BIOS flashing tool that runs independently of Windows. It communicates directly with the motherboard firmware, making it the most reliable method for applying a BIOS update on Gigabyte boards.
Steps:
- Insert your prepared FAT32 USB with the correct BIOS file
- Restart and press F8 at the Gigabyte splash screen to launch Q-Flash
- Select Update BIOS from the Q-Flash menu
- Navigate to your USB drive and select the BIOS file
- Confirm the update and wait — do not power off during this process
- System will restart automatically once the flash completes
Fix 6 — Try Incremental BIOS Updates (Advanced)
Why it works: Some Gigabyte motherboards cannot jump directly from a very old BIOS version to the latest release. The firmware ID validation rejects files that are too far ahead of the currently installed version. Updating in stages resolves this.
Steps:
- Identify your current BIOS version — visible in BIOS under System Information
- Visit Gigabyte’s support page and locate the full BIOS version history for your board
- Download an intermediate version first (e.g., if on F14, update to F16 before jumping to F20)
- Flash each version using Q-Flash, restarting fully between each update
- Continue updating in stages until you reach the target version
Important: Never interrupt a BIOS flash mid-process. A forced shutdown during flashing can corrupt the firmware permanently — requiring a BIOS chip replacement or professional recovery.
BIOS ID Check Error Gigabyte: Why This Board Brand Is Different
The BIOS ID check error appears across multiple motherboard brands — but it is reported far more frequently on Gigabyte boards than any other. This is not a coincidence. Gigabyte’s update system has specific characteristics that make this error easier to trigger than most users expect.
How Gigabyte’s BIOS Update System Works
Gigabyte motherboards use a firmware validation system that cross-checks three things before allowing any BIOS flash to proceed:
- Board model ID — confirms the file matches the correct product line
- Revision ID — confirms the file matches the exact hardware revision
- Firmware checksum — confirms the file is complete and uncorrupted
All three checks must pass simultaneously. If any single check fails — the update is blocked and the BIOS ID check error appears. This triple-layer validation is stricter than what most competing brands use, which is why Gigabyte users encounter this error more often.
The Q-Flash Tool and Why It Matters
Gigabyte’s built-in Q-Flash tool is the correct and recommended method for all BIOS updates on Gigabyte boards. It runs directly from the BIOS environment — completely independent of Windows — and communicates with the motherboard firmware at a hardware level.
Using third-party flashing tools, Windows-based utilities, or non-Gigabyte software to update a Gigabyte BIOS bypasses the intended update pathway and significantly increases the chance of triggering the ID check error or — worse — corrupting the firmware entirely.
Always use Q-Flash for Gigabyte BIOS updates. No exceptions.
Multiple Motherboard Revisions: The Core Confusion
This is where most Gigabyte BIOS ID check errors originate.
Gigabyte regularly releases the same motherboard model across multiple hardware revisions — Rev 1.0, Rev 1.1, Rev 1.2, and beyond. Each revision may feature slightly different VRM configurations, PCB layouts, or component choices. As a result, each revision requires its own dedicated BIOS file.
The problem is that Gigabyte’s support page lists all revisions under the same product name. A user searching for their board sees multiple download options that look nearly identical — and selects the wrong one.
Here is what the revision structure typically looks like on Gigabyte’s support page:
| Board Name | Revision | BIOS File |
| B650M AORUS Elite AX | Rev 1.0 / 1.1 | File A |
| B650M AORUS Elite AX | Rev 1.2 | File B |
| B650M AORUS Elite AX | Rev 1.3 | File C |
Downloading File B for a Rev 1.0 board will trigger the Gigabyte BIOS ID check error every single time — regardless of how the flash is attempted.
BIOS Naming Confusion: A Real Problem
Gigabyte’s BIOS file naming convention adds another layer of difficulty. Files are often named with version codes like F16, F17c, F18 — with letter suffixes indicating beta or specialized releases. Users unfamiliar with this system frequently download beta versions (identified by letter suffixes) when they intended to download a stable release.
Beta BIOS files carry different firmware IDs than their stable counterparts. Flashing a beta file onto a board running stable firmware can trigger the ID check error — even when the board model and revision are correctly matched.
Rule to follow: Unless your board has a specific known issue that only a beta BIOS addresses, always download the highest numbered version without a letter suffix.
Why Gigabyte Boards Trigger This Error More Than Others
To summarize the Gigabyte-specific factors that make this error more common:
- Stricter triple-layer firmware validation than most competing brands
- Multiple revisions per model with near-identical product names on the support page
- Complex BIOS naming system with stable and beta versions listed together
- Q-Flash dependency — the update pathway is more rigid and less forgiving of file errors
- OEM Gigabyte boards in prebuilt systems carry custom firmware IDs incompatible with standard Gigabyte BIOS files
Real-World Scenarios: Gigabyte BIOS ID Check Error
Recognizing your own situation in a real example is often the fastest path to the correct fix. Here are three scenarios that Gigabyte users commonly face — along with exactly what went wrong and how to address it.
Scenario 1: Downloaded BIOS for the Wrong Motherboard Revision
A user builds a new PC around a Gigabyte B650M AORUS Elite AX motherboard. Several months later, they decide to update the BIOS to improve CPU compatibility. They visit Gigabyte’s support page, search their board name, and download the first BIOS file listed — without noticing the revision tab at the top of the page.
Their board is Rev 1.2. The file they downloaded was built for Rev 1.0 and Rev 1.1.
Q-Flash loads the file, runs the ID check — and immediately throws the error.
What went wrong: Gigabyte’s support page lists multiple BIOS files under the same product name, separated only by revision tabs. The revision number is not prominently labeled on the download button itself, making it easy to grab the wrong file on the first visit.
How to fix it:
- Return to Gigabyte’s official support page
- Look for the revision selector tab directly below the product name
- Match it against the revision printed on the physical motherboard
- Re-download the correct revision-specific BIOS file
- Reformat the USB to FAT32, copy the new file, and retry Q-Flash
Scenario 2: Used a BIOS File From a Similar But Different Model
A user owns a Gigabyte B550 AORUS Pro. While searching for a BIOS update, they find a forum post recommending a specific BIOS version for improved RAM stability. They follow the link — which points to the Gigabyte B550 AORUS Pro AC support page instead of the standard B550 AORUS Pro page.
The two boards share nearly identical names. The BIOS files, however, are completely different — the AC variant includes additional wireless networking firmware that changes the board’s firmware ID entirely.
The flash attempt fails at the ID check stage. Retrying with the same file produces the same result every time.
What went wrong: Gigabyte produces several closely named variants of popular boards — standard, AC, V2, XT — each carrying a distinct firmware ID. A BIOS file built for one variant will never pass the ID check on another, even when the boards look nearly identical on paper.
How to fix it:
- Identify your exact board name — check the model name printed on the motherboard itself, not a forum post or third-party listing
- Navigate directly to that specific model’s support page on gigabyte.com
- Download only from the official page for your exact model
- Avoid following BIOS download links from forums or third-party sources — always go directly to Gigabyte’s support portal
Scenario 3: OEM Prebuilt Motherboard Rejecting Official Gigabyte BIOS
A user purchases a mid-range prebuilt desktop. After opening the case, they identify the motherboard as a Gigabyte model and decide to update the BIOS directly from Gigabyte’s official website to improve performance. They match the model name, select the correct revision, format the USB correctly, and launch Q-Flash with confidence.
The ID check error appears immediately — and keeps appearing regardless of which BIOS version they attempt.
What went wrong: Prebuilt system manufacturers frequently partner with motherboard brands to produce OEM variants of standard boards. These OEM boards carry a custom firmware ID assigned by the system manufacturer — not by Gigabyte. No standard Gigabyte BIOS file will ever match this custom ID, making a direct flash permanently impossible through normal means.
How to fix it:
- Do not attempt further flash attempts — repeated failed flashes on OEM boards carry a small but real risk of firmware corruption
- Contact the prebuilt system manufacturer directly and request an official BIOS update for your specific system model
- Check the manufacturer’s support page for your prebuilt model — OEM BIOS updates are distributed through the system manufacturer, not through Gigabyte’s website
- If no update is available, consider whether the update is genuinely necessary before pursuing further options
Pattern to note: Scenarios 1 and 2 are fully user-resolvable with the correct file and a clean USB. Scenario 3 requires going through the system manufacturer — attempting to force a standard BIOS onto an OEM board will not work and risks making the situation worse.
When BIOS ID Check Error Can Be Dangerous

In most cases, the BIOS ID check error is a protective block — your system refused the update before any damage occurred. However, the situation becomes genuinely risky when users attempt to force the process past this warning.
Watch for these danger points:
- Repeatedly retrying a failed flash — multiple failed attempts can destabilize existing firmware even without completing the update
- Forcing incompatible files — using third-party tools to bypass the ID check can overwrite critical firmware segments, leaving the board unbootable
- Power loss mid-flash — if the update somehow begins and loses power mid-process, the result is partial firmware corruption
- Bricked motherboard — a fully corrupted BIOS means the board cannot POST, cannot enter BIOS, and cannot run Q-Flash — requiring physical BIOS chip replacement or professional recovery
Key awareness point: The ID check error itself causes zero damage. Every risk listed above comes from actions taken after the error appears — not from the error itself. Stop, identify the correct file, and follow the proper process.
When to Seek Professional Help for BIOS Errors
Some BIOS situations move beyond what standard troubleshooting can resolve. Recognize these signs early — acting quickly reduces the risk of permanent damage.
Contact a professional if you experience any of the following:
- System will not power on at all — no fans, no display, no POST screen after a failed flash attempt
- No display output after a BIOS update — board powers on but produces no signal to the monitor
- Q-Flash no longer loads — the tool itself is inaccessible, indicating firmware corruption at a deeper level
- BIOS update failed mid-process — system shut down or restarted unexpectedly during an active flash
- Error persists after every correct fix attempt — correct file, correct revision, correct USB format — but the ID check still fails consistently
Practical note: A corrupted BIOS does not always mean a dead motherboard. Professional technicians can recover many bricked boards through BIOS chip reprogramming — but only if the board reaches them before further damage occurs from additional fix attempts.
Frequently Asked Questions
Q1. What causes a BIOS ID check error on Gigabyte motherboards?
A Gigabyte BIOS ID check error is caused when the BIOS file you are attempting to flash does not match your motherboard’s firmware ID. The most common trigger is downloading a BIOS file built for a different motherboard revision — for example, using a Rev 1.0 file on a Rev 1.2 board. Corrupted download files and OEM motherboard restrictions are also frequent causes.
Q2. How do I fix the BIOS ID check error on my Gigabyte motherboard?
Start by locating the revision number printed directly on your physical motherboard, then visit Gigabyte’s official support page and download the BIOS file that matches your exact model and revision. Format your USB drive to FAT32, copy only the BIOS file onto it, and flash using Gigabyte’s built-in Q-Flash tool by pressing F8 at startup.
Q3. Can a BIOS ID check error damage my motherboard?
The BIOS ID check error itself causes no damage — it is a protective block that stops an incompatible file before it touches your firmware. Damage only occurs when users attempt to force the update past this block using third-party tools or experience a power loss mid-flash. Stop at the error, identify the correct file, and follow the proper Q-Flash process.
Q4. What is a motherboard revision and why does it matter for BIOS updates?
A motherboard revision is a hardware version identifier — Rev 1.0, Rev 1.1, Rev 1.2 — that indicates minor changes Gigabyte made to the board’s components or PCB layout after the original release. Each revision requires its own dedicated BIOS file because the firmware ID is tied to the specific hardware configuration of that revision. Using the wrong revision’s BIOS file will always trigger the ID check error.
Q5. Why does my Gigabyte BIOS ID check error keep appearing even with the correct file?
If the error persists despite using the correct model and revision file, check three things: confirm the USB drive is formatted to FAT32, verify the downloaded file is not corrupted by re-downloading it fresh from Gigabyte’s official site, and reset BIOS to default settings before retrying. If all three checks pass and the error still appears, your board may be an OEM variant with a custom firmware ID that does not accept standard Gigabyte BIOS files.
Conclusion
The Gigabyte BIOS ID check error is frustrating — but it is almost always caused by one fixable mistake: the wrong BIOS file for your specific motherboard revision.
Whether the trigger was a mismatched revision, a corrupted download, a similar-looking model variant, or an OEM board restriction — every scenario covered in this guide has a clear resolution path.
Start here: Locate your motherboard revision number, download the matching file from Gigabyte’s official support page, and flash using Q-Flash.
Always verify your exact motherboard model and revision before any BIOS update — that single habit prevents this error entirely.